
How to Upscale Videos with AI: 5 Best Ways

Use Movavi Video Editor!

  • NEW: Adjustable video templates for any vibe – made of Blocks

  • NEW: Blocks – pre-edited video segments you can customize

  • Fast and easy editing: cut, crop, adjust colors and speed

  • Auto subtitles, noise removal, hundreds of effects, and more

By clicking the download button, you're downloading a trial version of the program.*

Edited by
Ben Jacklin
14,903

Here’s how to upscale videos with AI, depending on what you’re working with. Topaz Video AI gives the most control on a strong PC, Aiarty Video Enhancer offers a lifetime license, VanceAI works in the browser, and DaVinci Resolve Studio’s Super Scale fits people who already edit there. Movavi Video Editor handles everything around the upscale: AI grain removal, editing, and export at up to 4K in one desktop app.

This guide is for two kinds of creators. If you vlog your trips, it’ll help older travel clips sit next to new footage on your YouTube channel. If you keep the family archive, it shows how to upscale old videos of birthdays, weddings, and road trips so it looks good on a big TV.

A regular resize stretches existing pixels across a bigger frame, so a small clip blown up to 4K just looks larger and softer. AI upscaling, also called super resolution, uses neural networks trained on many images to predict what a sharper, larger frame should look like, then draws in that detail. That’s how AI video upscaling software can increase sharpness and pixel count in one pass. But there’s no guarantee the added details existed in the original, so very small footage pushed very far can pick up invented texture.

How we picked

  • AI upscale videos or the cleanup around it. Each pick either rebuilds detail with AI or handles the denoising, color, and editing that upscaled footage still needs.
  • Help beyond pixel count. Tools earned points if they can upscale video quality too, with face models, denoising, stabilization, or frame interpolation.
  • Where it runs. We included desktop apps, a browser tool, and a pro editor, since a laptop and a gaming PC need different answers.
  • Price and free options. Every entry lists a starting price and what you can try before paying.
  • Learning curve. We noted how much a beginner has to learn before the first export.

Best ways to upscale videos with AI

Tool

Speed

Quality of the result

Ease of use

Is a powerful graphics card required?

Starting price

One-click AI Video Denoise; Fast Track HD and optional hardware acceleration speed up processing

No built-in AI upscaling; denoise keeps faces, textures, and edges sharp, and export goes up to 4K with standard scaling

Intuitive interface for beginners, with hover previews and drag-and-drop

No; Intel, NVIDIA, and AMD acceleration is optional

$19.95/month

A 30-second 720p or 1080p clip takes about 10–15 minutes to reach 4K on an RTX 4070-class GPU

Separate AI models for general footage, faces, and noise; upscales by 2x, 4x, or to a custom size

Many models and settings to learn; advanced options can overwhelm beginners

Yes: a GPU with at least 6 GB of VRAM on Windows, or an Apple M-series Mac

$45/month (billed annually)

Fast on a GPU, with Turbo mode for extra speed; slower in Step Mode or on a CPU

Three AI models for textures, indoor scenes, and low light; output up to 4K

Default settings let you export in a few clicks

No; runs on a CPU, and Step Mode supports GPUs with less than 6 GB of VRAM

$235 lifetime

Cloud processing; time depends on clip length, resolution, and scale factor, and short previews render quickly

Nexa model for everyday footage and Cineva for SD sources, output up to 4K

Upload in a browser, pick a model, preview, and download

No; processing runs on VanceAI’s servers

$15/month, billed annually (10 free credits to start)

Processor-intensive; 2x Super Scale renders faster than 4x

AI Super Scale at 2x, 3x, or 4x, with sharpness and noise reduction settings; tends to look clean but slightly soft

Steep learning curve for beginners

Recommended; DaVinci Neural Engine features lean heavily on the GPU

$295 one-time

Best for: travel vloggers and families who want to clean up old clips, edit them, and export in 4K without switching apps.

Price and platforms: full version from $19.95/month; Windows and macOS. Movavi Video Editor Free is there for testing, with a watermark and no 4K export.

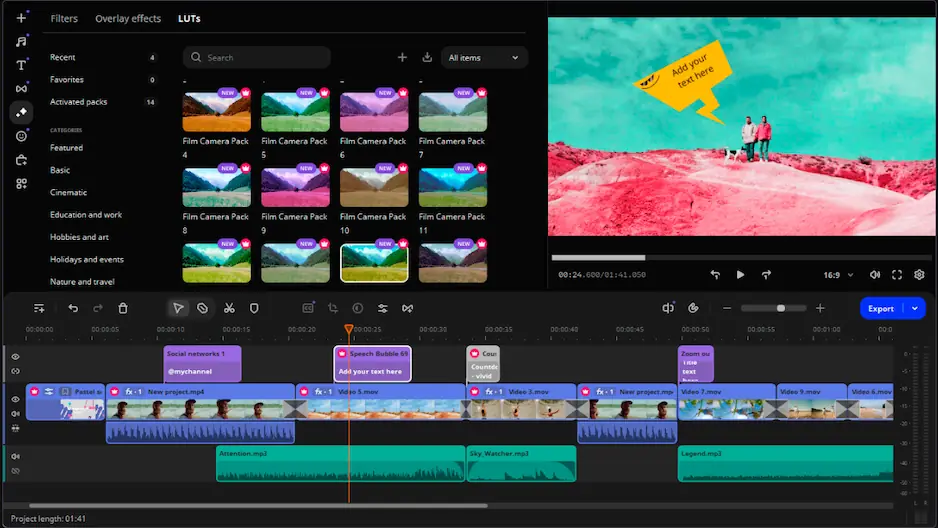
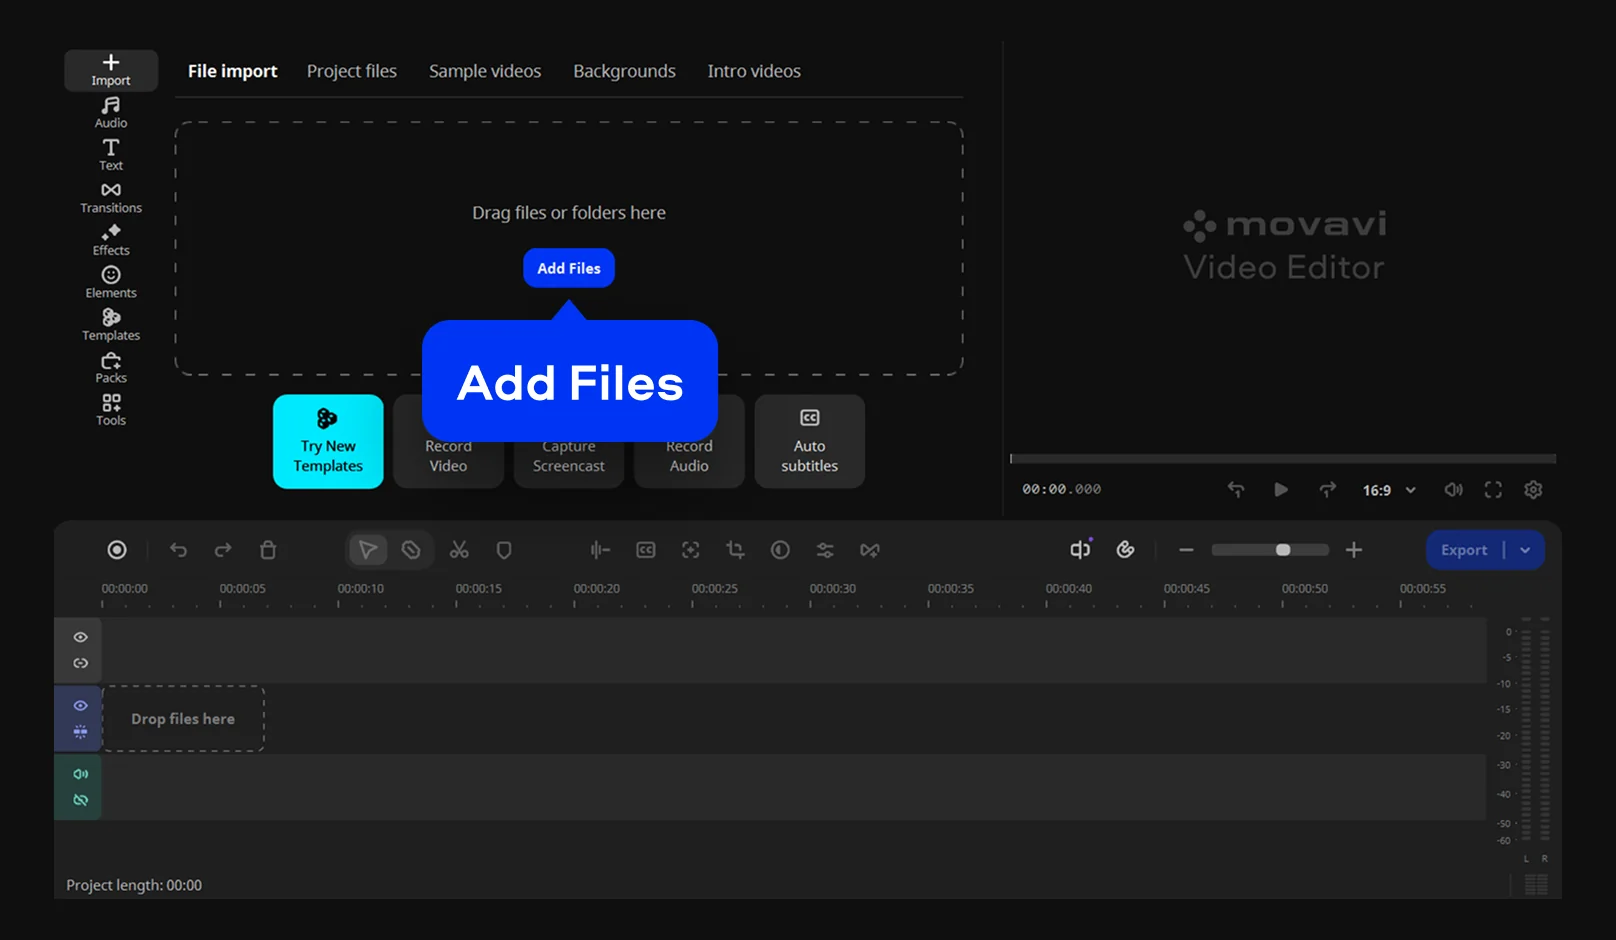
Why we picked it: Movavi Video Editor is an intuitive video editor with customizable video templates, one-click AI tools, and hundreds of drag-and-drop effects. It’s a desktop app for Windows and macOS, trusted by more than 70 million users worldwide. Hover previews and drag-and-drop editing keep the workflow simple and fast, so you spend the evening on your video instead of on menus. If you’re new to editing, Movavi Ideas posts fresh step-by-step video ideas every week, free for Movavi users.

The AI tools are there to take tedious jobs off your plate: auto subtitles, silence removal, auto-crop with subject tracking, and audio and video noise removal each run with a single click. For old footage, AI video denoise matters most. It clears grain and low-light artifacts from older phone clips while keeping faces and edges sharp, so the first export of that dim video already looks clean. To be clear about scope: the editor itself doesn’t run AI upscaling. It exports your project at up to 4K with standard scaling, while AI upscaling up to 8x lives in a separate program, Movavi Video Converter.

Key features:

  • AI video denoise: removes grain and low-light noise and keeps faces, textures, and edges sharp, which suits archival restoration.
  • Color correction: ready-made presets plus manual control over tone, contrast, and saturation for faded clips.
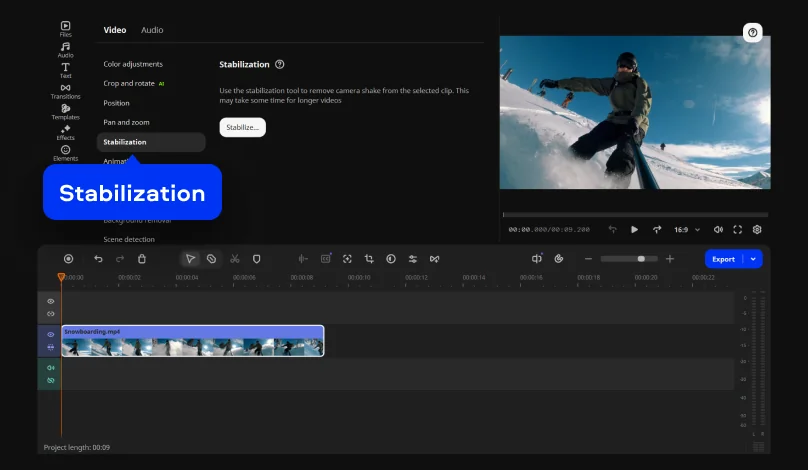
  • Stabilization: smooths handheld shake, with settings for accuracy, smoothing, and edge cropping.
  • Export and upload: TV export presets up to 4K, plus direct upload to YouTube.
  • Movavi Video Templates: Movavi Video Templates is a multi-style library of customizable, pro-looking, modular templates for any kind of video. Each template is a ready-made project built from Blocks, short pre-edited segments you fill with your own clips, and the Holidays and family and Travel categories suit restored birthday and road-trip footage.
Pros:
  • Denoise, color correction, stabilization, editing, and export all happen in one app

  • The full version includes every AI tool, with no watermark or export limits

  • Opens MP4, MOV, AVI, MKV, and WMV, so old camera files load without converting

  • More than 25 updates a year keep adding new tools

Cons:
  • Lacks advanced, detailed controls for a professional workflow

  • No web version or cloud integration

How to clean up and export old footage in Movavi Video Editor

Step 1. Download and install the program

Download Movavi Video Editor. Open the installation file and follow the on-screen prompts to finish the setup. When the installation is complete, launch the program.

Step 2. Add your clips

Upload old clips you want to restore to the program window. Then drag the clips onto the timeline.

Step 3. Remove the grain

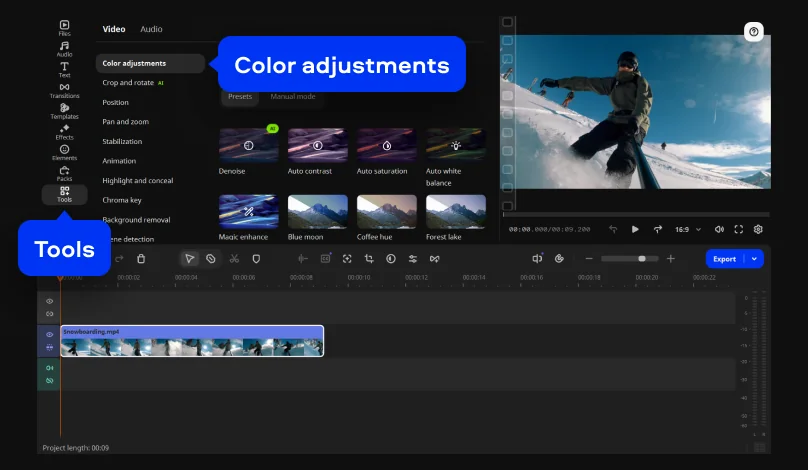
Select a clip on the timeline and open the video denoise tool by clicking Tools > Video > Color adjustments. Apply the denoise to the clip, then repeat this for every grainy clip in your project.

Step 4. Fix color and shake

Open the Color adjustments menu and choose a preset that brings back faded colors. If a clip was filmed handheld and looks shaky, open Stabilization as well.

Step 5. Export in 4K

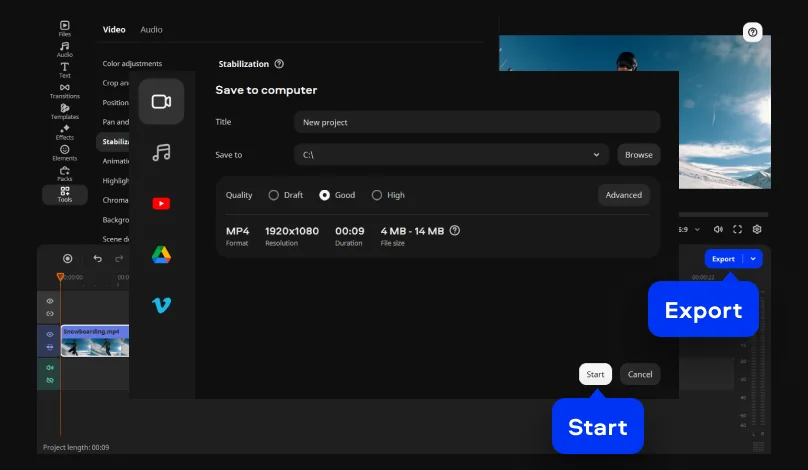
Click Export and choose MP4 as the format. Set the high resolution, then click Start to save your video.

Best for: travel vloggers with a powerful computer who want the most detail from archive footage before it goes into a YouTube video.

Price and platforms: personal plan from $45 a month (billed annually); Windows and macOS on Apple silicon.

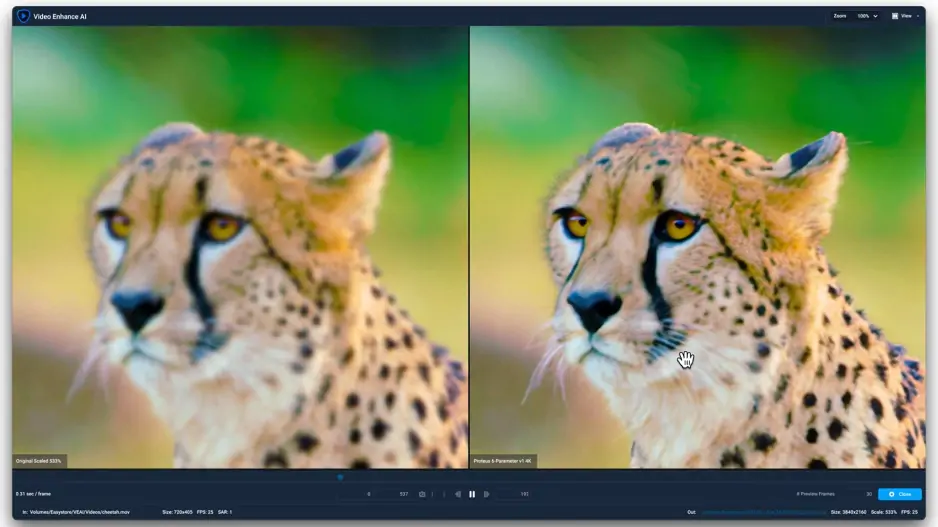
Why we picked it: Topaz Video AI, now sold as Topaz Video, is dedicated AI video upscaling software built around a lineup of models, each tuned for a type of footage. Proteus is the general-purpose model, and Iris targets degraded faces in compressed or interlaced clips, which helps with old family close-ups and interviews.

Key features:

  • Output resolution presets: 2x or 4x upscale, or a custom size; 4x turns 1080p into roughly 8K.
  • Face recovery: the Iris model works on blurry, noisy faces in low-resolution footage.
  • Frame interpolation: models such as Chronos and Apollo add in-between frames for smoother motion or slow motion.
  • Extra fixes: stabilization and SDR-to-HDR conversion are included in the Topaz Studio plan.

How to upscale a video with AI in Topaz Video AI

  1. Drag the clip into the Topaz Video window.
  2. Turn on the Enhancement toggle.
  3. Set Output Resolution to 2x Upscale or a 4K size.
  4. Choose an AI model, such as Proteus or Iris.
  5. Click Export.
Pros:
  • Lets you upscale 1080p to 4K with the 2x preset

  • Separate models for faces, noise, and fine detail

  • Unlimited local rendering, so your files stay on your computer

Cons:
  • No free trial for the desktop app, only a 48-hour refund window

  • Needs at least 16 GB of system RAM

  • Not supported on Intel-based Macs

Best for: lifestyle vloggers on a budget who want local AI upscaling of old phone footage with a one-time payment.

Price and platforms: lifetime license from $235; Windows and macOS.

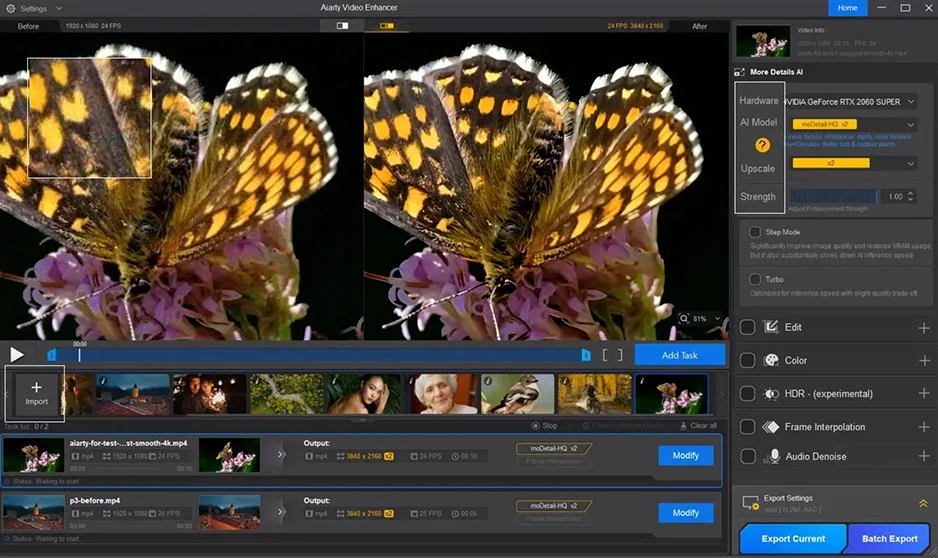
Why we picked it: Aiarty Video Enhancer gives you three AI models to match the footage: moDetail-HQ v3 for textures like hair, plants, and fabric in daylight, Smooth-HQ v3 for landscape shots, and superVideo vHQ for very dark clips. It also copes with modest hardware, since Step Mode processes video in smaller chunks for graphics cards with less than 6 GB of VRAM.

Key features:

  • Upscale options: 1x, 2x, or 4x, or a preset up to 4K UHD.
  • Blur cleanup without enlarging: the 1x option sharpens soft footage at its original resolution.
  • Frame interpolation: output up to 120 fps, plus a slow-motion option.
  • SDR to HDR: converts 8-bit SDR video to 10-bit HDR.
  • Batch processing: the full version exports a whole folder of clips in one go.

How to upscale a video to 4K in Aiarty Video Enhancer

  1. Drag the video file or folder into the main window.
  2. Keep Video Super-Resolution checked.
  3. Set Device to your GPU.
  4. Choose an AI Model.
  5. Pick 4K in the Upscale dropdown.
  6. Click Preview in the Generate Preview window.
  7. Switch to Dual Mode to compare the original and the result side by side.
  8. Choose MP4 as the format.
  9. Click Export Current.
Pros:
  • Runs on a CPU or a GPU, with Turbo mode for faster processing

  • A lifetime license means no recurring payments

  • The free trial needs no sign-up or credit card

Cons:
  • Trial exports carry a watermark and stop at 120 seconds of video

  • Output stops at 4K

  • Editing is limited to rotating, flipping, cropping, and color, so cutting and titles need a separate editor

Best for: lifestyle creators with an everyday laptop who need one clip upscaled today.

Price and platforms: new users start with 10 free credits. Paid plans start at $15/month, billed annually, and run in any web browser.

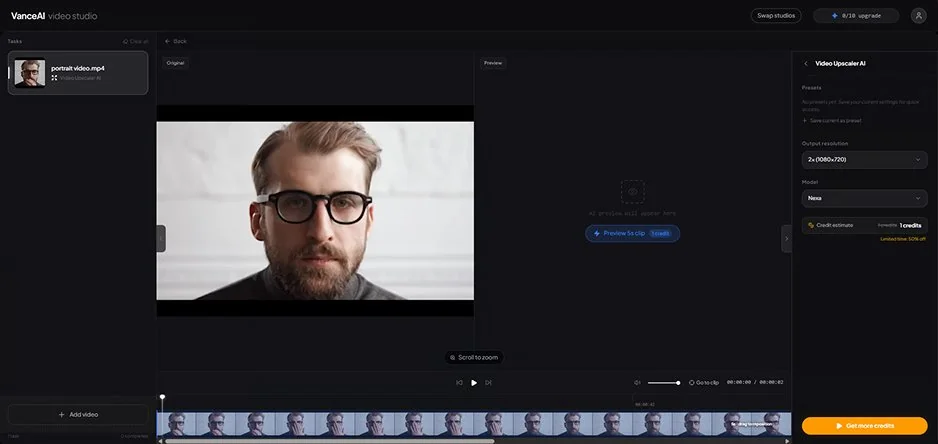
Why we picked it: VanceAI Video Upscaler runs in the browser and processes on its own servers, so your graphics card doesn’t matter. Nexa handles everyday footage at up to 4K, and Cineva is built for standard-definition sources such as VHS captures and ripped DVDs. A short preview costs a single credit, so you can check the result before paying for the full clip.

Key features:

  • File support: accepts MP4 and MOV files up to 10 GB.
  • Nexa scale factors: 1x, 2x, or 4x.
  • Cineva for SD: applies a fixed 4x upscale to standard-definition input.
  • Download window: finished MP4 files stay available for seven days.

How to upscale a video to 4K in VanceAI Video Upscaler

  1. Open VanceAI Video Upscaler in your browser.
  2. Upload an MP4 or MOV file.
  3. Choose Nexa or Cineva.
  4. Set the target resolution to 4K.
  5. Click Preview to render a short sample.
  6. Process the full clip.
  7. Download the MP4.
Pros:
  • Nothing to install and no GPU needed

  • Free trial credits with no credit card

  • Credit pricing per minute of video, so short clips stay cheap

Cons:
  • Output stops at 4K

  • Your footage is uploaded to VanceAI’s servers

  • Costs grow with clip length, resolution, and frame rate

Best for: creators who already edit in DaVinci Resolve and want AI upscaling right inside the timeline.

Price and platforms: DaVinci Resolve Studio is a $295 one-time purchase; Windows, macOS, and Linux.

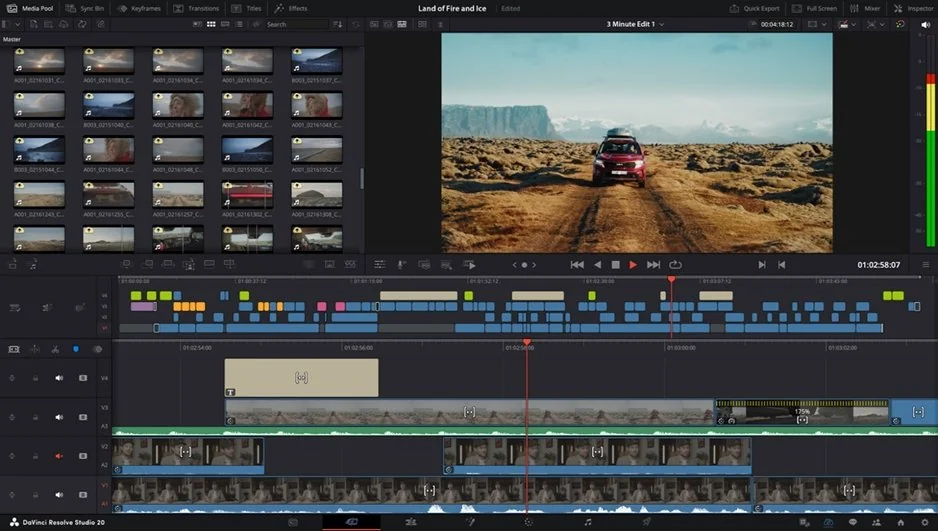
Why we picked it: DaVinci Resolve Studio adds Super Scale, an AI upscaler powered by the DaVinci Neural Engine. You apply it clip by clip in a 4K timeline, so older, lower-resolution footage can sit next to new clips without a round trip to another app.

Key features:

  • Super Scale factors: 2x, 3x, or 4x per clip, set in Clip Attributes.
  • Built-in cleanup: sharpness and noise reduction settings appear as soon as you pick a scale factor.
  • Quick comparison: toggle Super Scale on and off to see the before and after.
  • Studio only: the free DaVinci Resolve doesn’t include Super Scale.

How to increase video resolution with Super Scale in DaVinci Resolve Studio

  1. Open Project Settings.
  2. Set Timeline resolution to 3840 x 2160 Ultra HD.
  3. Drag the clip from the Media Pool onto the timeline on the Edit page.
  4. Right-click the clip and choose Clip Attributes.
  5. Set Super Scale to 2x.
  6. Click OK.
  7. Open the Deliver page.
  8. Click Add to Render Queue.
  9. Click Render All.
Pros:
  • Upscaling happens inside your edit, with no export to another app

  • A one-time purchase, with no subscription

  • Professional color correction with curves, color wheels, and HSL controls

Cons:
  • Takes serious effort to learn for beginners

  • Super Scale requires the paid Studio version

  • Neural Engine features lean heavily on the GPU

Which way fits you

If most of your old clips are dim, grainy phone videos from trips and you want a finished YouTube video, start in Movavi Video Editor. Clean the grain, fix the color, cut the boring parts, and export in 4K without leaving the app.

If the source is SD or 720p and you want true AI upscaling with fine control, Topaz Video AI is the strongest pick, as long as your computer meets its requirements. On a tighter budget, Aiarty Video Enhancer does local AI upscaling for a one-time price. For a single clip on a laptop, VanceAI gets it done in the browser. And if you already edit in DaVinci Resolve Studio, Super Scale saves you a round trip.

Upscaling is only half the fun, though. Once the footage looks right, Movavi Video Editor turns it into something your family will rewatch: import the clips, open the Templates tab, and drop a template from the Travel or Holidays and family category onto the timeline. Double-click each Block to swap its placeholder for your restored clip, then retype the text; the template’s music and transitions are already in place. Hundreds of built-in titles, transitions, and filters cover every style, from cozy family recaps to bold travel reels, and you can preview extra effects and templates on your own footage before buying. Start with Movavi Video Editor Free to test the workflow, then build the setup that fits your budget: the full version includes several templates, the Movavi Templates subscription adds the whole library, and Movavi Effects adds 10,000+ more effects.

Movavi Video Editor
Create awesome videos easily

*The free version of Movavi Video Editor may have the following restrictions depending on the build: watermark on exported clips, 60-second video or 1/2 audio length limit, and/or some advanced features unavailable when exporting videos.

Frequently asked questions

Can I upscale videos for free?

Partly. The free DaVinci Resolve doesn’t include Super Scale, and Aiarty’s trial adds a watermark and stops at 120 seconds of video. VanceAI gives new users 10 free credits, which covers a few short previews and clips.

How many times can you AI upscale a video?

Most tools in this guide stop at 4x, including Topaz Video AI, Aiarty, VanceAI, and Resolve Studio’s Super Scale. Movavi Video Converter goes further, with options up to 8x. Bigger isn’t automatically better, though: the further you stretch a tiny source, the more detail the AI has to invent.

Do I need a powerful PC for AI video upscaling?

It depends on where the processing happens. Topaz Video AI needs at least 16 GB of RAM and a capable graphics card. Aiarty can run on a CPU, and its Step Mode helps weaker GPUs. VanceAI processes on its own servers, so any computer with a browser works.

Which video formats can I upscale?

VanceAI accepts MP4 and MOV and returns an MP4. Aiarty exports to MP4, MOV, or MKV with H.264, H.265, or AV1 video. MP4 is the safest output if you plan to upload to YouTube or play the file on a TV.

Will upscaling fix a blurry video?

It helps with softness caused by low resolution. Blur from camera shake is a stabilization job, and grain is a denoising job, so many old clips look best after all three. VanceAI’s Autopilot, for example, runs its denoiser before the upscaler.

Have questions?
If you can’t find the answer to your question, please feel free to contact our Support Team.
Join us for discounts, editing tips, and content ideas

1.5M+ users already subscribed to our newsletter

By signing up, I agree to receive marketing emails from Movavi and agree to Movavi's Privacy Policy.