Snipping Tool in Windows 11 Not Working [12 Best Fixes]

Movavi Screen Recorder

  • Capture everything, not just your browser tabs
  • Highlight keystrokes and mouse actions
  • Draw on videos in real time

Free online screen recorder

  • Webcam
  • Microphone
  • Sound
  • Watermark

Supported browsers: Google Chrome, Mozilla Firefox, Microsoft Edge, Opera

Key takeaways

  • The Snipping Tool usually breaks because of small Windows glitches, not major system failures.
  • Quick fixes like restarting the tool, using Windows + Shift + S, or clearing temp files solve most Windows 11 snipping tool not working cases.
  • Updates, background permissions, and conflicting apps often play a role, so checking those settings helps a lot.
  • When the tool refuses to cooperate, alternatives like Screencapture.com or Movavi Screen Recorder keep your workflow moving.

I take screenshots and record small screen videos constantly, so when the Snipping Tool refused to open one afternoon, it threw me off. I clicked the icon a few times, leaned in like that would change anything, and still got nothing. No window, no message. Two days later it opened but saved a plain white screenshot, which was even more frustrating.

It turned out the tool wasn’t broken, just tangled up in background settings and software conflicts. Once I understood that, the fixes were much simpler. In this guide, I go through the steps I use whenever the Snipping Tool starts acting stubborn. They usually get it working again without much trouble.

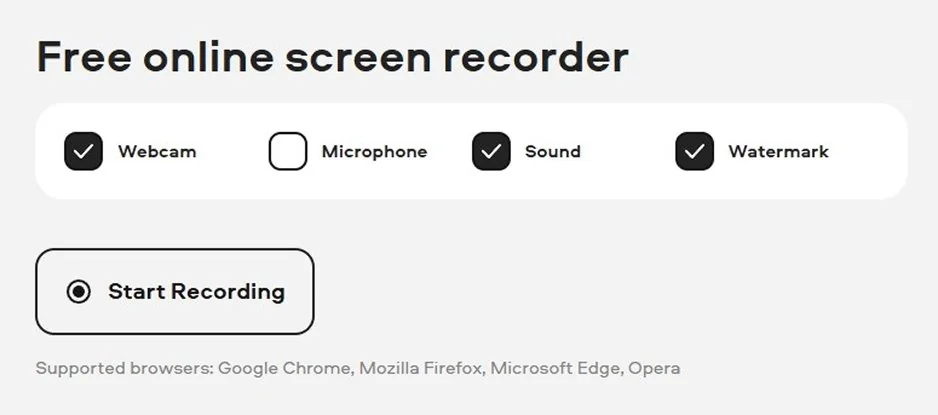
Screencapture.com keeps things simple, which is its biggest strength. It opens in the browser and lets you start recording with almost no setup. Choose what you want to capture the full screen, a window, or a single tab and it begins right away. When you stop, the video saves automatically, so you are not hunting through folders. The whole process feels straightforward and easy to use.

It only records video, covering just part of what the Snipping Tool usually does, but that focus makes it fast and light. No installs, no updates waiting, no clutter. If you need to show someone what is on your screen and want to do it quickly, Screencapture.com gives you a clean, practical option.

disclaimer_person
Our goal is to provide you with only verified information. To ensure this, Movavi Content Team does the following:
  • When selecting products to include in our reviews, we research both demand and popularity.

  • The team tests all the products mentioned in this article.

  • When testing, we compare the key characteristics of the products, which include selecting capture area, schedule recording, showing keystrokes and mouse, and other significant features.

  • We study user reviews from popular review platforms and make use of this information when writing our product reviews.

  • We collect feedback from our users and analyze their opinions of Movavi software as well as products from other companies.

Snipping Tool not working on Windows 11: Fixes at a glance

Method

Description

End the stuck Snipping Tool task in Task Manager and relaunch it to clear freezes or unresponsive behavior.

Press Windows + Shift + S to trigger the snipping overlay directly and bypass issues with the taskbar icon.

Switch to another capture tool such as Movavi Screen Recorder to keep working while you troubleshoot.

Best ways to fix the Snipping Tool not working in Windows 11

When the Snipping Tool won’t launch, freezes mid-capture, or saves a blank image, these are the fixes that actually make a difference. You can jump in anywhere, but starting with the quick ones is the most efficient.

1. Restart the Snipping Tool process

One of the most common problems is the tool getting stuck in the background. Windows keeps the old process running, so the app refuses to reopen or respond. Closing that process forces Windows to start a fresh instance, which fixes the issue almost immediately.

  1. Press Ctrl + Shift + Esc to open Task Manager.
  2. Look for Snipping Tool or Snip & Sketch in the list.
  3. Right click it and choose End task.
  4. Open the Snipping Tool again.

When the tool closes this way, Windows starts it fresh the next time you run it. It is the first thing I try before messing with deeper settings.

2. Use the keyboard shortcut instead of the app button

Press Windows + Shift + S to bring up the snipping bar directly. It often works even when the taskbar icon refuses to open the app. The shortcut is quick, reliable, and perfect for grabbing something on the fly without waiting for the full tool to load.

3. Use an alternative app for taking screenshots

If the Snipping Tool keeps arguing with you, switch to something else and get on with your work. Movavi Screen Recorder is an easy backup. You can grab the whole screen or outline a smaller area in a couple of clicks, and you don’t have to dig through settings to make it behave. It also lets you preview and edit your screenshots. It also doubles as a clean, reliable video recorder, which solves a lot of “I’ll just show you instead of explaining” moments. It won’t repair the Snipping Tool, but it keeps your workflow moving when the built-in tool stalls.

4. Repair or reset the Snipping Tool through Settings

Repairing or resetting it through the system settings can clear corrupted files or broken configurations.

  1. Open Settings and go to Apps.
  2. Select Installed apps.
  3. Find Snipping Tool and open Advanced options.
  4. Click Repair first.
  5. If that does nothing, use Reset.

Repair keeps your data and preferences and only fixes damaged components. Reset wipes the app to its default state. I usually try Repair first because it leaves everything intact, but Reset has solved every deeper problem I’ve had so far, especially random crashing during captures. It is worth trying before reinstalling anything manually.

5. Enable the Snipping Tool background permissions

Windows sometimes blocks the Snipping Tool from appearing on top of other applications if its permissions are restricted. Turning on the background access often fixes issues where the toolbar refuses to show.

  1. Go to Settings.
  2. Open Apps.
  3. Select Installed apps and find Snipping Tool.
  4. Open Advanced options.
  5. Under Background app permissions, choose Always.

This may feel unnecessary, but it gives the Snipping Tool the freedom to appear whenever you call it, no matter what you are doing on the screen. It is a small adjustment that solves more problems than you might expect.

6. Clear the Snipping Tool temporary files

The Snipping Tool relies on a temp folder to store its scraps, and that folder can get messy fast. When it does, the tool may freeze, save empty images, or stop saving altogether because the temp folder stopped supporting new files. Clearing out those leftovers often gets it working normally again.

  1. Press Windows R and type temp.
  2. Delete the files inside that folder.
  3. Repeat with %temp%.
  4. Restart your computer.

You do not need to delete every last file. Skip anything Windows refuses to remove. What matters is clearing enough space that the Snipping Tool can create fresh temp files without bumping into old junk.

7. Update Windows 11

A skipped update can lead to capture issues, which may be why my Snipping Tool is not working. I'm aware of that and recommend you to check it from time to time. Installing the latest updates often brings back missing features or fixes bugs that affect screen capture tools.

  1. Open Settings.
  2. Go to Windows Update.
  3. Click Check for updates.

If you see optional updates, especially anything related to display or input devices, installing them usually helps too. After updating, restart your computer even if Windows does not ask for it.

8. Disable Focus Assist

Focus Assist keeps notifications quiet, but in some cases it blocks UI elements like the snipping toolbar. Turning it off can fix situations where the screen dims but no controls appear.

  1. Open Settings.
  2. Go to System.
  3. Select Focus Assist.
  4. Turn it off.

If you still want some form of quiet mode, set it to Priority only instead of shutting it down completely. As long as it’s not blocking pop-ups too aggressively, the Snipping Tool should appear normally.

9. Remove conflicting screenshot apps

If you have other screenshot or overlay tools installed, they might be causing Windows Shift S not working issues. Apps like OneDrive, Dropbox, Nvidia overlays, Discord, and browser extensions can all interfere.

Try closing or disabling:

  • Browser add-ons that take screenshots
  • Cloud sync tools with clipboard or capture features
  • Gaming overlays
  • Clipboard managers
  • VPN apps with privacy overlays

If the Snipping Tool suddenly starts working again after closing one of these, you have found the culprit. You can then reconfigure that app so it stops grabbing screen shortcuts.

10. Run the System File Checker (SFC)

If core system files are damaged, often because of an update missing, the Snipping Tool can break in unpredictable ways. Running a system scan repairs those files automatically.

  1. Type cmd in the Start menu.
  2. Right click Command Prompt and choose Run as administrator.
  3. Enter:
    sfc /scannow
  4. Press Enter.

The scan takes a few minutes. If it finds anything, Windows will repair the files on its own. After the scan finishes, restart your computer.

11. Reinstall the Snipping Tool via PowerShell

If the app is badly corrupted, reinstalling it from scratch can fix problems that no repair tool can touch.

  1. Right click Start.
  2. Select Windows Terminal (Admin).
  3. Enter this command:
    get-appxpackage snippingtool remove-appxpackage
  4. After it finishes, reinstall the tool from the Microsoft Store using the standard download option.

This removes the entire app and puts back a clean version. It is more drastic than the Repair button but sometimes necessary when Windows loses track of the tool’s files.

12. Turn off automatic time sync bug (time/date trick)

A strange bug in Windows caused the Snipping Tool to fail because of certificate timing issues. Adjusting the system clock temporarily can bypass that problem.

  1. Open Settings.
  2. Go to Time and Language.
  3. Turn off Set time automatically.
  4. Set the date back one day.
  5. Open the Snipping Tool.
  6. Return the time setting to automatic.

This workaround may sound odd, but it has solved launch issues for many users. If the Snipping Tool suddenly refused to open after a recent update, this trick is worth trying once.

Conclusion

Once you get familiar with the kinds of issues that trip up the Snipping Tool, the whole thing feels easier to manage. Most problems come from Windows itself, a stalled process, a shortcut conflict, or an update that left something half finished. The fixes are usually simple nudges that get everything working again.

It also helps not to get stuck fighting with it in the moment. If the tool refuses to cooperate, just switch to something else for a bit: a different screen shortcut or a simple recorder like Screencapture.com and finish what you were doing. Then you can come back and sort out the issue with a clearer head. After a bit of practice, you figure out what your system responds to, and the Snipping Tool in Windows 11 behaves normally again.

Movavi Screen Recorder

The perfect way to record anything from your screen

Disclaimer: Please be aware that Movavi Screen Recorder does not allow capture of copy-protected video and audio streams.

<p>Movavi Screen Recorder</p>

Frequently Asked Questions

What happened to the Windows Snipping Tool?

The old Snipping Tool didn’t disappear in Windows 11, even though it felt like it for a while. Microsoft folded it together with Snip & Sketch and released a combined version through the Microsoft Store. The new tool looks a bit like the classic one, which is comforting if you used it for years, but it still carries over some of Snip & Sketch’s behavior. It stays on screen after a capture, which is something I missed when the tools were separate.

How do I re-enable Snipping Tool?

The simplest fix is to restart it from scratch. Open Task Manager, look for the Snipping Tool in the list, and end the task. Then launch it again from the Start menu. If it still acts stubborn, head into its background app permissions in Settings and make sure it’s allowed to run. That small switch has brought it back to life more than once.

How do I get a Snipping Tool to work?

I usually start with the shortcut. Press Windows + Shift + S and see if the snipping bar slides in. If it does, the tool is fine and the app icon is what’s stuck. If nothing shows up, move on to the basics: restart the process in Task Manager, check for Windows updates, clear out your temp files, or turn off Focus Assist. One of those steps usually gets the tool moving again.

How do I run a repair on a Snipping Tool?

Open Settings, go to Apps, and find the Snipping Tool in the list. Under Advanced options, hit Repair and let Windows try to fix the broken pieces without touching your preferences. If that doesn’t help, click Reset. It wipes the app clean and replaces it with a fresh copy, which often solves the problems a regular repair can’t.

Have questions?
Have questions?
If you can’t find the answer to your question, please feel free to contact our Support Team.
Join us for discounts, editing tips, and content ideas

1.5M+ users already subscribed to our newsletter

By signing up, I agree to receive marketing emails from Movavi and agree to Movavi's Privacy Policy.