Top 7 Methods to Remove Audio from Video

Movavi Video Editor
  • Trim, cut, crop, and rotate videos
  • Add titles, stickers, and transitions
  • Apply visual effects

By clicking the download button, you're downloading a trial version of the program.*

Edited by
Ben Jacklin
4,575

To remove audio from video, mute the clip or detach its audio track in any video editing software that has a volume control. Seven tools do it in a few clicks: Movavi Video Editor for travel vlogs and unboxings on Windows or Mac, CapCut for quick vertical clips, Filmora for vlogs on a schedule, DaVinci Resolve for pro-level audio, VEED for browser edits, Clipchamp for family videos on a PC, and Canva for clips inside a design.

This guide is for you if you post travel videos or unboxings, edit family road trips, or cut game highlights, and the original sound is wind, chatter, or a song you can’t keep. Mute a video first, then add your own voiceover or background music. Every method below comes with short steps.

Quick comparison of the 7 methods

Method

Best for

Platforms

Free version

Starting price

Learning curve

Travel vlogs and unboxings

Windows, macOS

Yes

$19.95/month

Easy

Quick vertical travel clips

Mobile-first, plus desktop

Yes

$9.99/month

Medium

Vlogs on a regular schedule

Desktop

Yes

$19.99/month

Medium

How we picked

We chose video editing tools from our comparison data that have a documented way to remove sound from video: a mute control or a detach-audio command. Then we weighed platforms, free versions, price, and how steep the learning curve is for beginners. Movavi goes first because this guide runs on Movavi’s site. The other six follow in no scored order.

How to mute a video: 7 methods with steps

Best for: Lifestyle vloggers who want a silent clip from a travel video or an unboxing, ready for music or a voiceover.

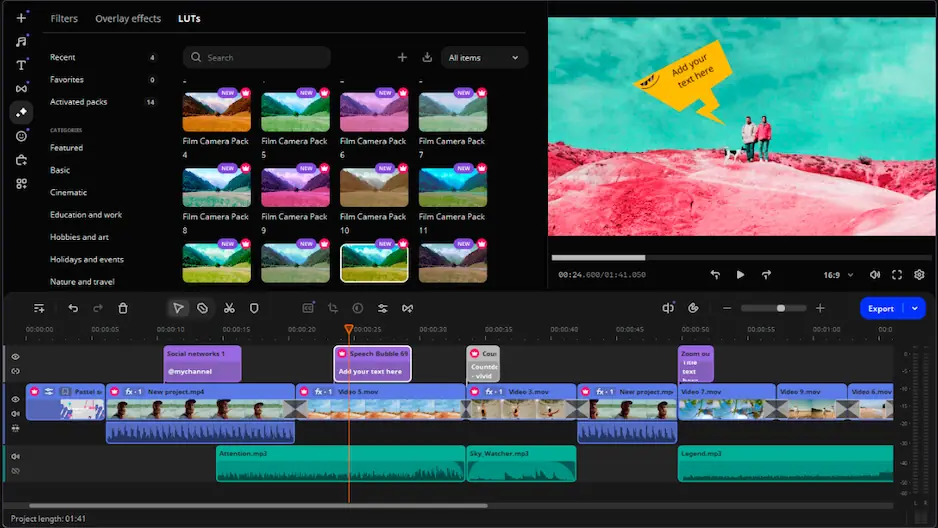
Why we picked it: Movavi Video Editor is an intuitive video editor with customizable video templates, one-click AI tools, and hundreds of drag-and-drop effects. It’s a desktop app for Windows and macOS. The mute sits in Clip settings, so a beginner gets a silent clip on the first try, and hover previews with drag-and-drop keep the rest of the edit quick.

Steps:

  1. Click Add Files and choose your video.
  2. Select the clip on the timeline.
  3. Click the Mute track icon at the left side of the timeline.
  4. Click Export.
  5. Choose a format, such as MP4.
  6. Click Start.

Main features:

  • Volume in Clip settings: mutes a clip’s original sound and leaves room for a voiceover or new music.
  • AI audio noise removal: clears traffic, wind, and steady hums in one click while keeping the original voice sharp. Use it when you want the talking, minus the noise.
  • Auto-silence removal: finds pauses in audio tracks, with adjustable pause length and volume thresholds.
  • Templates: Movavi Video Templates is a multi-style library of customizable, pro-looking, modular templates for any kind of video.
  • Formats: opens MP4, MOV, AVI, MKV, and WMV video files.
Pros:
  • Works offline on the desktop, with no account or cloud required.

  • AI tools come with the full version, with no AI credit system.

Cons:
  • Lacks advanced, detailed controls for a professional workflow.

  • No flexible UI customization.

  • No web version or cloud integration.

Price and platforms: Windows and macOS. Free version available. Starts at $19.95/month.

Best for: Lifestyle vloggers cutting quick vertical travel clips.

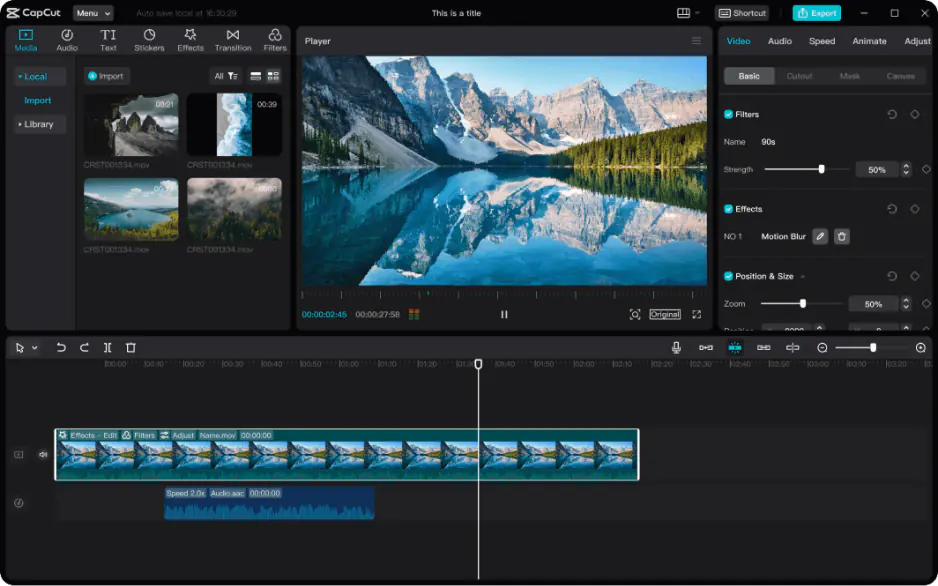
Why we picked it: CapCut’s tools are built around short, trending videos, which suits TikTok, Reels, and Shorts. It also has a library of licensed music in different genres to replace the original sound.

Steps:

  1. Select the clip on the timeline.
  2. Open the Audio panel on the right.
  3. Drag the Volume slider to 0.

Main features:

  • Licensed music library: tracks in different genres.
  • AI toolkit: speech recognition for subtitles, AI voiceover, and background replacement, available with AI credits.
  • Vertical templates: trending templates applied as a whole, with little customization.
Pros:
  • Licensed music library for the swap.

  • AI voiceover when you’d rather not record your own.

Cons:
  • The best assets need a subscription.

  • AI features run on credits.

Price and platforms: Mobile-first, with a desktop version. Starts at $9.99/month.

Best for: Lifestyle bloggers who post vlogs on a regular schedule.

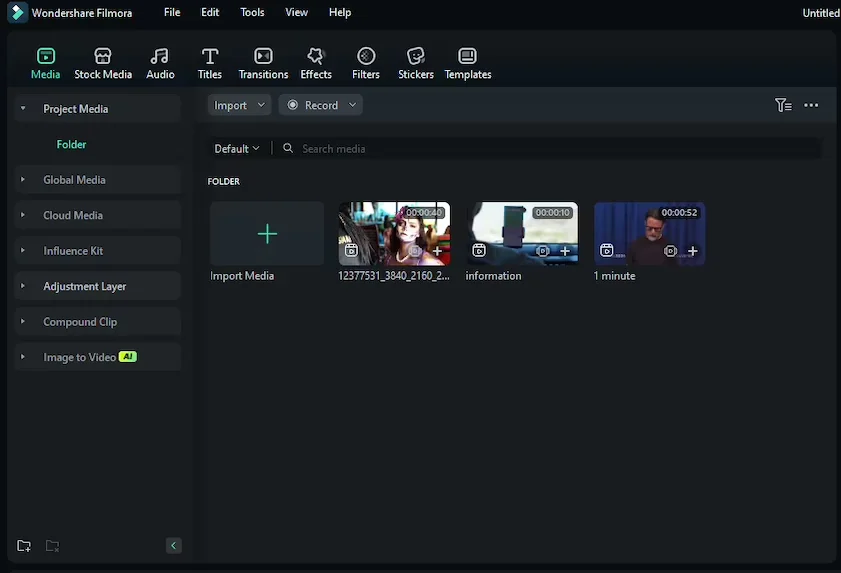
Why we picked it: Filmora is a desktop editor with a multitrack timeline and a large set of micro-tools. You can mute a clip, or detach its audiotrack onto a separate row and delete it.

Steps:

  1. Select the clip on the timeline.
  2. Right-click the clip.
  3. Click Mute.

Main features:

  • Multitrack timeline: sits next to keyframe animation and motion tracking.
  • Music and sounds library: built in, with AI music matching.
  • AI audio processing: enhances sound without complex settings.
Pros:
  • A built-in music and sounds library for the replacement sound.

  • AI audio processing in a compact toolkit.

Cons:
  • Most assets and templates need a separate subscription.

  • AI features need separate AI credits.

Price and platforms: Desktop. Starts at $19.99/month.

Best for: Game highlight edits when you already know a professional editor.

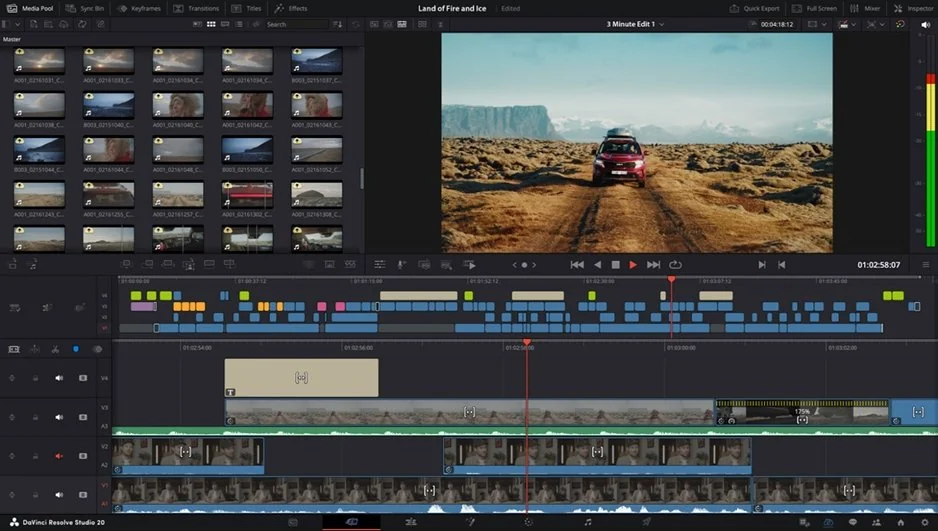
Why we picked it: DaVinci Resolve gives audio its own module, Fairlight. For one mute it’s more studio than you need, but it’s the place to go when you want to shape game audio in depth.

Steps:

  1. Open the Edit page.
  2. Click the M button in the header of the audio track.

Main features:

  • Separate modules: Edit, Color, Fairlight for audio, and Fusion for VFX.
  • Fairlight: a full sound engineering studio with professional mixing tools.
  • DaVinci Neural Engine: the full AI toolkit is available only in the paid version.
Pros:
  • A free base version.

  • Audio work gets its own module, so it stays apart from color and VFX.

Cons:
  • A complex, multi-part interface that takes time to learn.

  • No built-in licensed music library.

Price and platforms: Windows, macOS. The paid version is $295.

5. VEED

Best for: Unboxings and reviews edited in the browser, with captions.

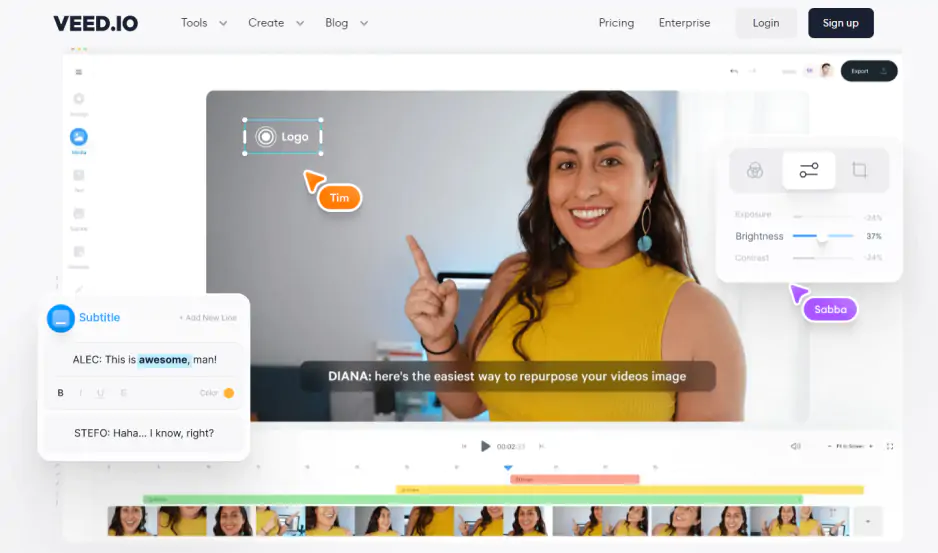
Why we picked it: VEED runs in the browser, so there’s nothing to install, and it’s aimed at captioned videos and business video.

Steps:

  1. Log in to VEED.
  2. Click Create Project.
  3. Drag your video into the Upload a file area.
  4. Click the video on the timeline to open the Edit tab.
  5. Click the volume icon.
  6. Click Export.

Main features:

  • Clean Audio: one-click speech cleanup that keeps the voice and loses the noise, on paid plans only.
  • Remove Silences: cuts pauses and filler words automatically.
  • Real-time collaborative editing: a team can work on one video.
Pros:
  • A simple browser interface.

  • Subtitles and a brand kit in the same editor.

Cons:
  • AI credits are spent on every action and can run out mid-project.

  • Long, heavy files lag, and speed depends on your internet.

Price and platforms: Browser. Starts at $10/month.

Best for: Quick family travel videos on a Windows PC.

Why we picked it: Clipchamp is Microsoft’s browser-based editor, built into Windows 11 and Microsoft 365, and it’s aimed at quick, simple videos.

Steps:

  1. Click the clip on the timeline.
  2. Click the speaker symbol. The symbol changes to a speaker with a cross.

Main features:

  • Detach audio: moves the sound to its own row on the timeline for deleting.
  • AI noise reduction: a toggle, free.
  • Screen and webcam recording: built into the simple timeline.
Pros:
  • Free AI noise reduction.

  • A simple timeline that’s clear to beginners.

Cons:
  • It lacks the tools and performance for long, large projects.

  • It needs a fast internet connection to import files.

Price and platforms: Browser; built into Windows 11 and Microsoft 365. Starts at $11.99/month.

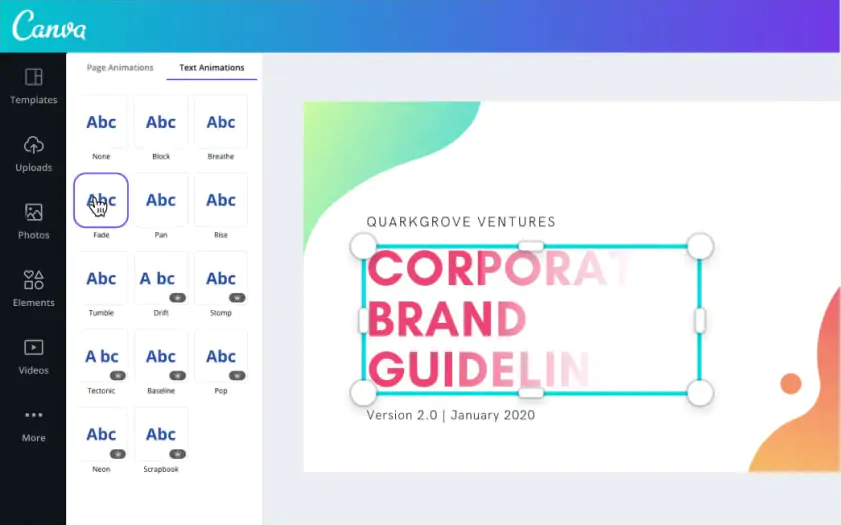
Best for: Pet videos and lifestyle clips dropped into a design.

Why we picked it: Canva is a graphic design builder with video as a secondary format. If your clip already sits in a post or a story, you can mute it without leaving the design.

Steps:

  1. Click the video in your design.
  2. Click the speaker icon.
  3. Click the mute icon.

Main features:

  • Design templates: a huge library for posts, stories, and promos.
  • Compact audio set: volume and fade.
  • Enhance Voice and Beat Sync: both on the paid plan; Enhance Voice removes background noise.
Pros:
  • A familiar drag-and-drop interface.

  • A music library for the replacement sound.

Cons:
  • The video editor is an add-on to the design layout, so precise timeline work and long videos are inconvenient.

  • Some audio features are paid only.

Price and platforms: Browser and app. Starts at $15/month.

How to choose

If you film travel vlogs or family road trips and edit on a laptop, go with Movavi Video Editor. It’s a desktop app for Windows and macOS that runs offline with no account or cloud. You can detach the audio from a clip, export it as its own file, or turn it down with per-clip volume control. Sometimes the problem is only the wind, and your narration is worth keeping. In that case, AI audio noise removal clears traffic, wind, and hums in one click and keeps your voice. To fill the gap, drag a copyright-free track from the built-in library onto the timeline.

  • If you make short vertical clips for TikTok, CapCut is the closer fit. It’s a mobile-first editor and part of the TikTok ecosystem, but its AI tools run on credits.
  • If you edit for clients on a steady schedule, Filmora gives you a multitrack timeline and a long list of micro-tools for niche tasks.
  • DaVinci Resolve suits professional sound design, since audio gets its own module, Fairlight. Plan for a longer learning curve and higher hardware demands.
  • VEED is for teams editing branded videos together in the browser. Its AI features also spend credits as you work.
  • Clipchamp comes built into Windows 11 and Microsoft 365, so it handles a quick one-off fix online.
  • Canva makes sense when the video is one piece of a design, such as a post or story with a video insert.

If you run a small online shop, your Instagram promo may only need the room noise gone and a track underneath. Movavi gets that done in a few drags. Once the music is in, turn on beat detection: it marks the rhythm on the timeline so your cuts land right on the beat.

Movavi Video Editor
Create awesome videos easily

*The free version of Movavi Video Editor may have the following restrictions depending on the build: watermark on exported clips, 60-second video or 1/2 audio length limit, and/or some advanced features unavailable when exporting videos.

Frequently asked questions

What is the difference between muting and detaching audio?

Muting silences a clip and keeps its sound in place. Detaching moves the sound to a row of its own, so you can delete or edit it separately. Clipchamp and Filmora offer both.

Which video formats can I mute in Movavi Video Editor?

MP4, MOV, AVI, MKV, and WMV. For audio, Movavi Video Editor imports and exports MP3, WAV, and FLAC.

Can I record a voiceover after I remove sound from video?

Yes. Movavi Video Editor records narration from a connected microphone onto the timeline, and the six other tools here list voiceover recording too. CapCut, VEED, Clipchamp, and Canva add AI voiceover on top.

Can I add background music after I mute the video?

Yes. Movavi Video Editor includes copyright-free music tracks and sounds, so you can drop in a new mood after muting the original noise.

Have questions?
If you can’t find the answer to your question, please feel free to contact our Support Team.
Join us for discounts, editing tips, and content ideas

1.5M+ users already subscribed to our newsletter

By signing up, I agree to receive marketing emails from Movavi and agree to Movavi's Privacy Policy.