9 Free Ways to Record Audio from a Computer [2026]

Use Movavi Screen Recorder to record audio from a PC:

  • Capture system sounds and microphone

  • Trim recorded audio

  • Save recordings in high quality

By clicking the download button, you're downloading a trial version of the program.*

Edited by
Ben Jacklin
6005

Whether you're a musician, podcaster, or just want to capture a video call, recording your computer's audio can be a great way to get high-quality recordings. In this article, we will discuss how to record computer audio using different tools, including a desktop screen recorder, built-in apps, and audio-editing software.

How to record computer audio: Best ways

disclaimer_person
Our goal is to provide you with only verified information. To ensure this, Movavi Content Team does the following:
  • When selecting products to include in our reviews, we research both demand and popularity.

  • The team tests all the products mentioned in this article.

  • When testing, we compare the key characteristics of the products, which include selecting capture area, schedule recording, showing keystrokes and mouse, and other significant features.

  • We study user reviews from popular review platforms and make use of this information when writing our product reviews.

  • We collect feedback from our users and analyze their opinions of Movavi software as well as products from other companies.

Best PC Audio Recorders for Windows

  • Best for:

    recording computer audio, video calls, and voice recording

  • OS:

    Windows and macOS

  • G2 rating:

    4.5 out of 5, 54 reviews

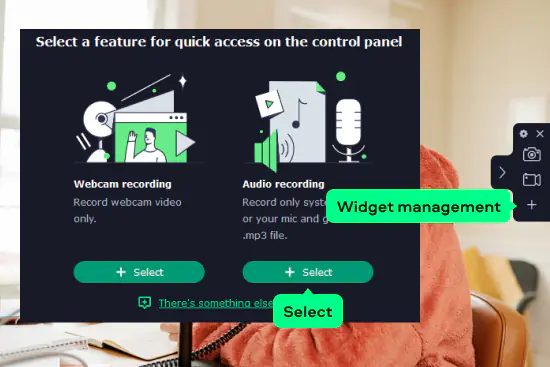
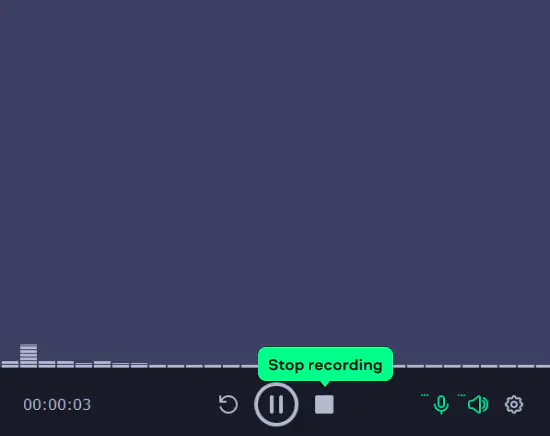
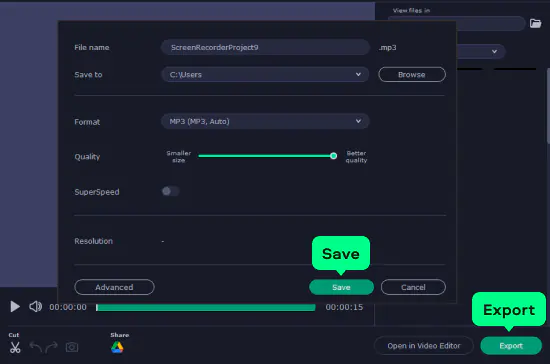
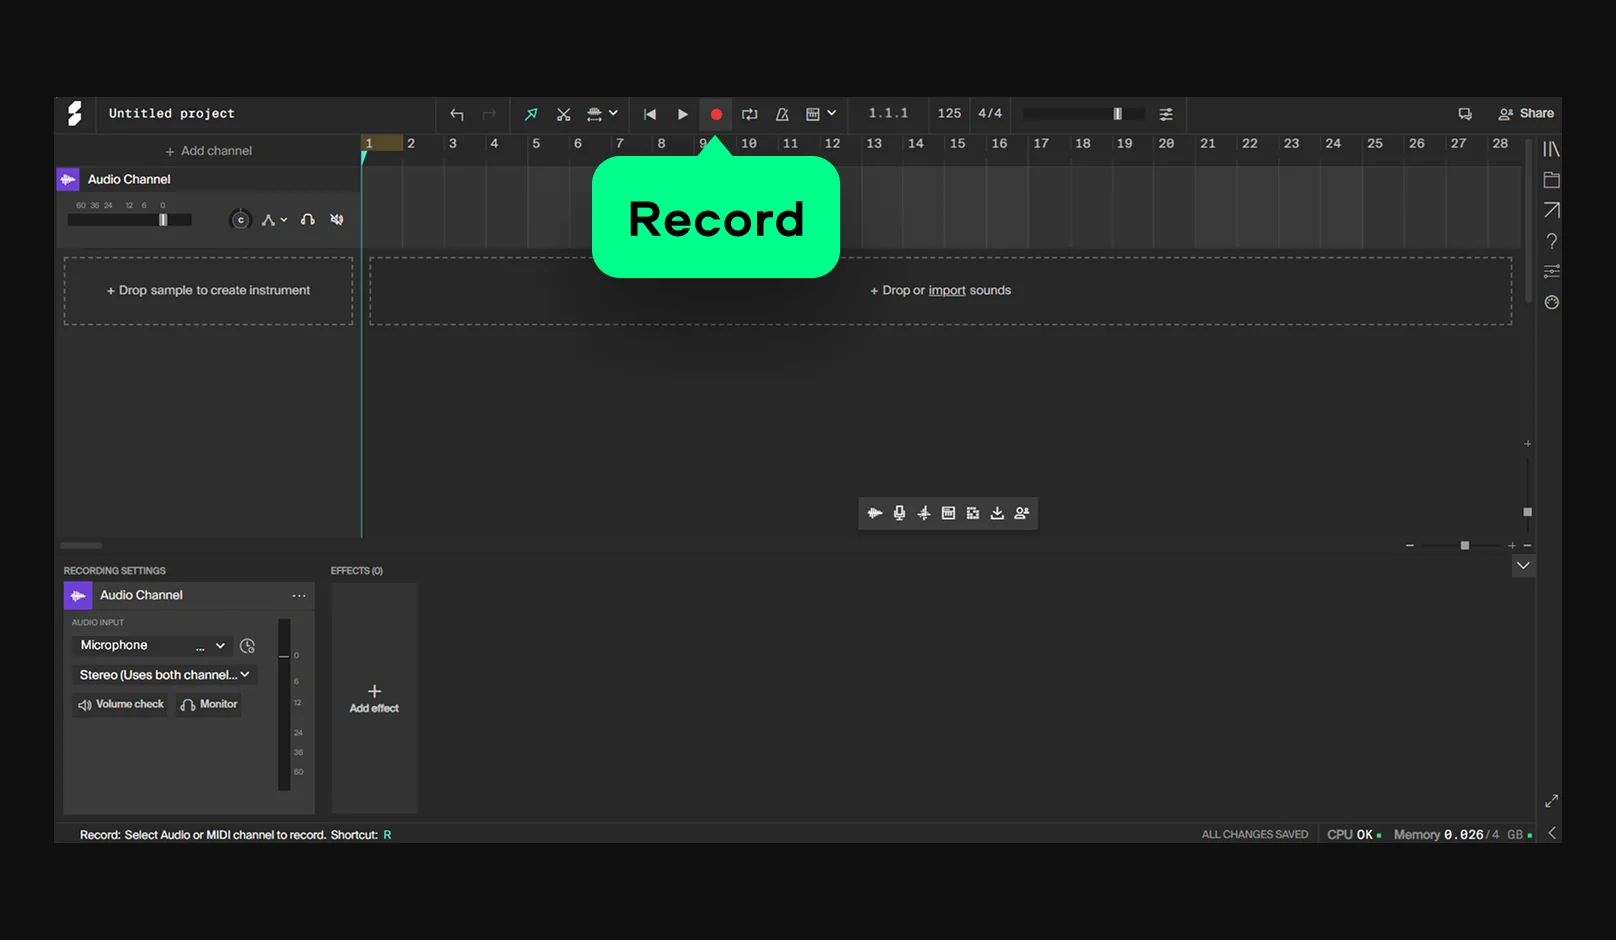
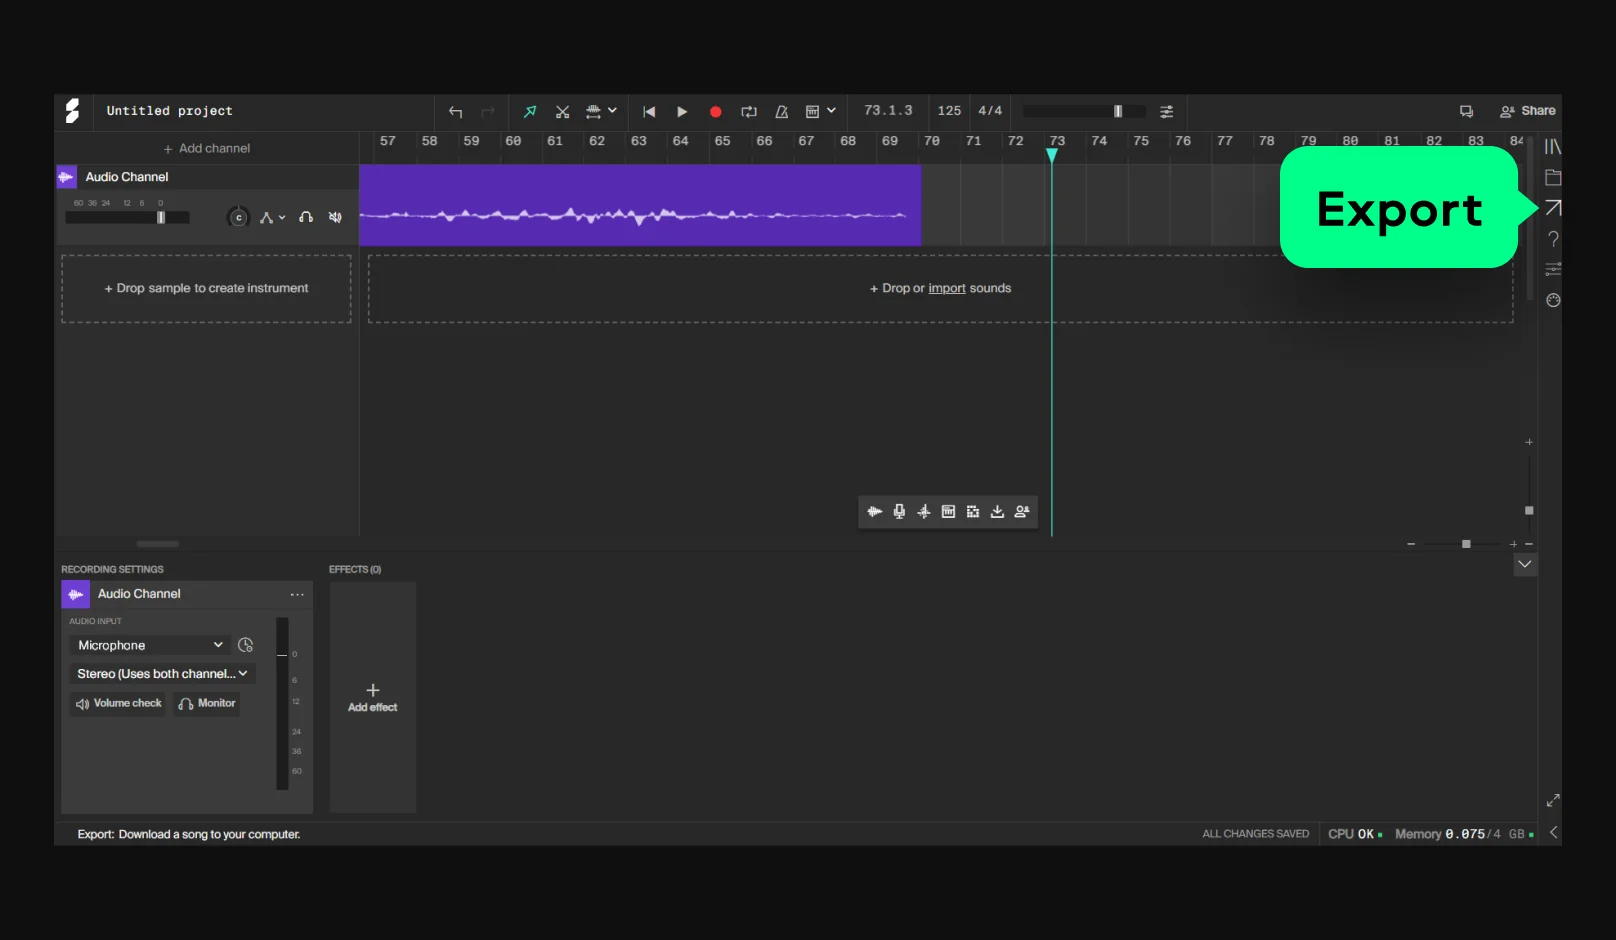
One of the best ways to capture audio is to use Movavi Screen Recorder. The program has a simple interface and a wide range of features, including the ability to record audio directly from your microphone, from your speakers, or both. It also has a built-in editor that lets you make simple trims to your recordings. The program is compatible with recent macOS versions and is also compatible with Windows 10 and 11 (64-bit). I liked how smoothly it handled switching between different audio sources during my tests.

Key features:

  • Remove unwanted segments right after the recording
  • Save anything you need to keep from your screen to boost your day-to-day productivity
  • Use AI noise reduction for clear sound
  • Schedule recordings of important online events
Pros:
  • Record music, speech, and audio effects in high quality to enhance tutorials and presentations

  • Customize your recordings and make quick edits in just a few clicks

  • Easy to set up and use

  • Share links to your recordings or upload them to the cloud and social media straight from the app

Cons:
  • Only the features of the full version can boost your productivity

Here’s how to record audio from a computer using Movavi Screen Recorder:

Step 1. Download and install the program

In the first step, you will need to download and install Movavi Screen Recorder on your PC or laptop.

Step 2. Set the recording parameters

If you want to record audio only, click the Plus icon on the sidebar. In the dialogue window, click Select under the Audio recording option. Close the window

Then hit Audio recording on the sidebar. If you want to record just audio from your computer, activate System audio. You can activate the recording from your microphone as well.

Step 3. Start recording

To record your computer sound, hit the REC button. When you're done, click the Stop button to finish.

Step 4. Edit and export your recording

You can cut and trim recorded audio. When you're done, hit the Export button and then Save.

That's how easy it is to record sound from a PC with Movavi Screen Recorder!

  • Best for:

    capturing quick microphone recordings on a Windows 11 device

  • OS:

    Windows 11

  • Microsoft Store rating:

    3.7 out of 5

Sound Recorder (formerly called Voice Recorder in Windows 10) is Microsoft’s native audio-recording app for Windows 11. It enables users to record voice through a microphone or headset quickly and easily. The app includes only basic editing tools, so it works well for simple voice notes or short audio clips. For more advanced editing, effects, or multi-track work, a third-party app will be necessary. When I used it, the straightforward layout felt convenient for quick one take recordings.

Key features:

  • Audio waveform graphic display to visualize volume during a recording
  • Timestamp markers to call out specific sections of an audio clip
  • Multiple microphone options
  • Adjustable playback speed

How to record audio with Voice Recorder:

Step 1. Open the Windows 11 Sound Recorder app

In the search box, type “Sound Recorder” to open the app. If it is not installed, you can download and install it for free from the Microsoft Store.

Step 2. Record computer audio with Sound Recorder

In Sound Recorder, click on the red Record button to begin recording. You can also use a hotkey combination (Ctrl + R) to begin your audio recording. If you need to pause the recording, click the Pause button at any time and click it again to continue recording.

Step 3. Finish recording and save your audio file

To complete your audio recording with Sound Recorder, click on the Stop button. Sound Recorder will automatically display your recording for you on the left side of your screen. To rename your file, change its save destination, and/or share it, right-click on the file name.

3. System Stereo Mix

  • Best for:

    recording system and game audio, making software or app tutorials, recording online classes

  • OS:

    Windows 10, Windows 11

Stereo Mix is a virtual recording device included in some Windows audio drivers. It does not record audio by itself. Instead, it can be selected as an input source in compatible apps. This allows you to capture all audio playing on your computer, including system sounds, music, and game audio. When I enabled it on my system, it worked smoothly for capturing internal audio without extra tools.

Key features:

  • Captures all audio playing on your PC
  • Acts as an input source for recording apps
  • Records internal audio without extra hardware
Pros:
Cons:
  • Requires an audio-recording app

Here’s how to record audio on a PC:

Step 1. Open the Sound window in Control Panel

Open Control Panel and click Hardware and Sound. Then hit Sound.

Step 2. Select Stereo Mix as your recording device

In the Recording tab, select Stereo Mix as your recording device. If you don’t see Stereo Mix in the list of recording devices, it might not be enabled on your computer. To enable it:

  • Right-click the blank space in the Recording tab and select Show Disabled Devices.
  • Right-click Stereo Mix and choose Enable.

4. VLC

  • Best for:

    Windows and Mac users who want an easy-to-use program that can record audio coming from programs

  • OS:

    Windows, macOS, Linux

  • TechRadar rating:

    4.4 out of 5

VLC is a free, cross platform media player that includes advanced audio recording functions. It can record system audio when configured with the correct input device such as Stereo Mix on Windows or a virtual audio driver on macOS. This is powerful but not the simplest option for beginners. When I tried recording with it, the setup felt a bit confusing but the final audio quality was solid.

Key features:

  • Records system audio when configured with loopback or Stereo Mix
  • Supports many export formats (MP3, WAV, FLAC, AAC, etc.)
  • Free and cross-platform
  • Powerful playback and conversion tools
Pros:
  • Record audio from websites, apps, and other programs

  • Wide range of features

  • Free

Here’s how to record desktop audio with VLC:

Step 1. Download and install VLC

Download the installation file and install the program on your computer.

Download VLC

Start with opening up the VLC media player.

Step 2. Specify the settings

From the main menu, go to View and select Advanced Controls from the drop-down menu. Next, go to the Media tab and select Open Capture Device.

Step 3. Select your audio input

Open the Audio device name menu, select Stereo Mix as your audio input.

Step 4. Start recording computer audio

Click Play and then the red button to record. Click the red button again to stop recording.

To open your record, go to Media > Open File. Files recorded via VLC will have the vlc-record prefix added to their names.

Quick summary
  1. Editor’s choice: Movavi Screen Recorder

    Allows users to record both microphone and system audio.

  2. For recording and editing computer audio: Audacity

  3. For recording quick, simple audio clips: Windows Voice Recorder

Best audio recorders for a Mac

  • Best for:

    recording audio from a computer

  • OS:

    Windows, macOS, Linux

  • PCMag rating:

    4 out of 5

Audacity is a free and open-source audio recording program that you can use to record audio on your PC. It has a wide range of features, including the ability to record multiple tracks at once, edit your recordings, and add effects. Recent versions add high-fidelity audio support, global “master effects”, improved performance and UI themes. It seemed very powerful to me for a free tool, especially once I explored the multitrack options.

Key features:

  • Record multiple tracks at once
  • Edit your recordings (trim, cut, mix)
  • Add built-in effects
  • Export/import in many formats (WAV, MP3, FLAC 32-bit PCM, Ogg, etc.)
  • Global “master effects” (compressor, limiter, mastering tools)
  • High-resolution audio support via 32-bit FLAC import
Pros:
  • Works on macOS, Windows and Linux

  • Wide range of features

  • Free

  • Can record multiple tracks at once

  • Can edit recordings

  • Can add effects

Cons:
  • Not as user-friendly as some other programs

To record audio with Audacity, follow these steps:

Step 1. Download and install Audacity

Start by downloading Audacity from the link below. Once it's downloaded, double-click on the file to install it.

Download Audacity

Once Audacity is installed, open it by double-clicking on the icon on your desktop or by searching for it in the Start menu.

Step 2. Set the audio input and output devices

Before you can start recording, you need to set Audacity to use the correct audio recording and playback devices. To do this, select the desired option from the corresponding drop-down lists marked by the microphone icon and the speakers icon.

Step 3. Record your computer audio

To record audio, click on the Record button in Audacity and start talking. When you're done recording, press the Stop button to finish.

Step 4. Edit your recordings

Once you've finished recording, you can edit your recordings by clicking on them in the Audacity timeline. This allows you to cut out any unwanted parts, add effects, and more.

Step 5. Export your recordings

When you're done editing your recordings, you can export them in a variety of formats by going to File > Export (on a Mac, Audacity > Export). This allows you to share your recordings with others or use them in other projects.

That's it! You now know how to record sound from a computer using Audacity.

  • Best for:

    real-time audio capture

  • OS:

    Windows, macOS, Linux

  • G2 rating:

    4.6 out of 5, 123 reviews

Open Broadcaster Software (OBS) is a freely available and open-source application designed for capturing video and audio content, as well as facilitating live streaming. OBS can record PC sound and video, allowing for subsequent editing to construct scenes composed of various inputs. It supports the capture of images, text, browser windows, webcams, capture cards, and additional elements. This system audio recorder gives its users the ability to select the audio source, such as system sound, capture card sound, microphone sound, and more. Furthermore, it offers features for adjusting audio bitrate, sample rate, and channels. During my testing, it felt incredibly flexible although the setup took me a bit longer than expected.

Key features:

  • Capture system (desktop) audio
  • Record audio from specific apps
  • Save multiple audio tracks for editing
  • Mix audio sources in real time
  • Add audio effects and plugins
  • Customize output format and quality
  • Free and open-source
Pros:
Cons:

Here’s how to record system audio with OBS on a Mac:

Step 1. Install OBS

Download OBS from the official website.

Download OBS

Open it and allow all permission prompts (microphone, screen recording, accessibility). These are required for audio capture.

Step 2. Add a system-audio source

If your Mac supports native capture (OBS 29+ on macOS 13+):

Open Sources > + > macOS Audio Capture.
Choose System Audio or a specific app.
This is the easiest and recommended method.

If macOS Audio Capture is not available:

Install a virtual audio device:

  • BlackHole (free)
  • Loopback (paid)

Set your Mac’s Output to that device in System Settings > Sound.
Then in OBS, add Audio Input Capture and choose the virtual device.

Step 3. Record your audio

Click Start Recording, play the audio you want to capture, then click Stop Recording.
OBS saves the file automatically.

To export audio-only, open Settings > Output > Recording and choose a format like WAV, MP3, or AAC.

  • Best for:

    quick audio recording and easy editing

  • OS:

    Windows, macOS

  • G2 rating:

    4.3 out of 5, 34 reviews

WavePad Audio Editor is a simple yet versatile audio recorder and editor for Mac and Windows. It lets you capture audio, edit clips, apply effects, clean background noise, and export in many popular formats. Ideal for voice recordings, music editing, podcasts, and quick audio cleanup, it’s intuitive and supports a wide range of file types. When I tried it, the noise reduction seemed surprisingly effective for a lightweight tool.

Key features:

  • Record and edit music, voice, and other audio
  • Apply basic edits like cut, copy, paste, and trim
  • Work with many audio formats (WAV, MP3, FLAC, Ogg, etc.)
  • Process multiple files at once with batch editing
  • Add audio effects and use VST plugins
  • Clean noise and restore damaged audio
  • Convert files and edit metadata tags

Here’s how to record audio with WavePad:

Step 1. Install and open WavePad

Download WavePad from the official website and launch the program.

Step 2. Select your microphone or input device

Go to Record > Rec Option and choose the input device you want to record from (microphone, line-in, etc.).

Step 3. Start recording

Click the Record button (red circle) in the toolbar. Speak or play the audio you want to capture.

Step 4. Stop and review

Click Stop when finished. Your recording will appear in the WavePad timeline, ready for playback.

Step 5. Edit if needed

Use the editing tools (cut, trim, noise reduction, effects) to polish your audio.

Step 6. Save or export

Go to File > Save File As to save your project, or File > Export to export your audio in MP3, WAV, FLAC, or other formats.

Best online audio recorders

  • Best for:

    fast browser-based voice recording with AI cleanup

  • OS:

    online

  • G2 rating:

    4.6 out of 5

VEED.io is an online recorder and editor you use directly in your browser. It lets you record voice, screen and webcam without installing software. After recording, you can trim audio, clean background noise with AI and export in common formats. Auto subtitles and transcription help turn recordings into scripts or captions for podcasts, tutorials and short clips. When I tested it, the AI cleanup feature seemed very helpful for quick voice recordings. 

Key features:

  • Record microphone audio in the browser
  • Capture screen recordings with system sound (when enabled)
  • Remove background noise with AI
  • Generate automatic transcripts and subtitles
  • Export audio in common formats

How to record audio with VEED.IO:

Step 1. Open VEED.IO in your browser

Go to the VEED website and choose the Voice Recorder or Screen & Audio Recorder tool.

Go to VEED.IO

Step 2. Select your microphone

Allow browser permissions, then pick the mic you want to use. You can record voice only, or combine it with screen recording if needed.

Step 3. Start the recording

Click Record and speak. When finished, click Stop.

Step 4. Edit your audio (optional)

Trim unwanted parts or use AI noise removal to clean background noise.

Step 5. Export your file

Choose your preferred format and download the audio to your device.

  • Best for:

    online multitrack recording and music creation

  • OS:

    online

  • G2 rating:

    3.8 out of 5, 3 reviews

Soundation is an online music studio you run in your browser. It lets you record audio, arrange tracks, and mix with built in effects and automation tools. You can use virtual instruments, loops, and samples to build full songs or podcasts, then export high quality files or collaborate in real time with other users on the same project. When I tried it, the collaborative features felt surprisingly smooth for a browser tool.

Key features:

  • Record audio and MIDI in the browser
  • Use virtual instruments and built-in synths
  • Work with loops, samples and preset sounds
  • Edit and arrange tracks on a multitrack timeline
  • Add effects like EQ, compression and reverb
  • Collaborate online in real time

How to record audio in Soundation:

Step 1. Open Soundation Studio

Go to soundation.com, launch the Online Studio and create a new project.

Go to Soundation

Step 2. Add an audio channel

Click Add channel and choose Audio channel. This creates the track where your recording will appear.

Step 3. Set your input device

In the bottom panel, select the microphone or interface you want to use. Your browser may ask for permission the first time you record. Make sure to allow access.

Step 4. Start recording

Press Record in the transport bar. If it’s your first session, Soundation may guide you through a quick latency calibration. Speak or play, then hit Stop when finished.

Step 5. Export your audio

Click the Export icon in the right-hand sidebar. Choose LO-RES MP3, HI-RES MP3 or WAV.

Tips for recording audio on a PC in high quality

Below, you’ll find a few tips that will help you make high-quality audio recordings on your computer.

  • Minimize background noises
    Make sure you’re recording in a quiet place. Some seemingly quiet sounds, like an AC working or someone typing, can turn out pretty loud on the recording. So, pay attention to any background sounds that can affect your recording. Also, make sure to use a PC audio recorder with a noise reduction feature such as AI noise reduction of Movavi Screen Recorder.
  • Use an external microphone
    Of course, it’s easier to use a built-in computer microphone to record audio, but the quality will not be that great. To get a better sound on your recording, use an external microphone. Depending on how professional you want your recording to be, choose appropriate equipment.
  • Use an external sound card
    External audio cards provide a better sound quality. It can take a while to figure out how to set the equipment, but once it’s done, you’ll definitely improve the quality of your audio recordings.

What to look for in a computer audio recorder

When looking for an audio recorder, you should consider the following factors:

  • The operating system it is compatible with: The audio recorder should be compatible with the operating system of your computer.
  • The audio recording format it supports: The audio recorder should be able to record in the format that you need.
  • Its ability to record from different sources: The audio recorder should be able to record audio from multiple sources like websites and apps.
  • Whether or not the program is free, paid, open-source, etc.: You may want to consider a free or paid program depending on your budget and needs.
  • Ease of use: The audio recorder should be easy for you to use without any experience with other programs of this type in the past.
  • The quality of the recordings: The audio recorder should produce high-quality recordings.

If you’re struggling with choosing the app for audio recording, consider looking at the table below. Whether you want to record computer audio in high-quality or just simple fragments, you sure can find something that meets your needs.

Conclusion

Now you know which factors to consider when looking for an audio recorder. Keep these in mind and you will be able to find the best program for your needs. Our personal recommendation is Movavi Screen Recorder due to its versatility and ease of use.

Movavi Screen Recorder

The perfect way to record anything from your screen

Disclaimer: Please be aware that Movavi Screen Recorder does not allow capture of copy-protected video and audio streams.

<p>Movavi Screen Recorder </p>

Frequently asked questions

Is it possible to record computer audio?

Yes, you can use any sound capture software to record computer audio. We recommend using Movavi Screen Recorder. With this handy recording tool you can effortlessly make recordings, take screenshots, and perform audio capture. Use this functionality to create engaging video lessons, make presentations and software demos. Make your screencasts more informative by showing keystrokes and mouse clicks.

How can I record audio from my computer?

Follow these simple steps to record audio from your computer with Movavi Screen Recorder:

  1. To record audio from your computer, start by downloading and installing the program.
    Download Movavi Screen Recorder for Windows
    Download Movavi Screen Recorder for Mac
  2. Select the Screen Recording option.
  3. Choose the audio input you want to record from – your microphone, system sound, or both.
  4. Click the REC button and start talking into your microphone or playing back audio from your computer.
  5. When you’re finished recording, click the Stop button and save the file to your computer.

Can you record internal audio on a PC?

There is a number of audio recording programs available, but the following five are some of the best:

  • Movavi Screen Recorder – Best for recording computer audio, video calls, and gameplay
  • Audacity – Best for recording audio from a computer
  • OBS – Best for real-time audio capture
  • Screencastify – Best for teachers, designers, marketers
  • Apowersoft – Best for unlimited sound recording

For more options, check out this article:
Read about free internal audio recorders

Does Windows 10 have an audio recorder?

Yes! Microsoft Voice Recorder is a built-in audio recording program that comes with Windows 10. It lets you record audio from your microphone or the system sound, and it’s very easy to use. To record computer audio on Windows 10, follow these simple steps:

  1. Open Microsoft Voice Recorder and click Record.
  2. Click Stop recording. The file will be saved on your computer.
  3. Trim your audio if needed.

Can Audacity record computer audio?

Yes, to capture your computer’s system audio with Audacity, you just have to ensure that the program is set to capture internal audio. In the toolbar at the top of the Audacity window, click on Audio setup to change settings and include your system’s audio.

How do I record audio on Windows?

You can record audio on Windows with Movavi Screen Recorder in just a few simple steps:

  1. Download and install Movavi Screen Recorder.
  2. Set your recording parameters by clicking the + icon and choosing Audio recording.
  3. To record from your microphone, click on the microphone icon at the bottom of the window. To record your computer’s audio, click on the speaker icon to capture system audio. You can use both simultaneously if you want to capture system and voice audio.
  4. Click REC to begin recording.
  5. Click Pause at any time to pause your recording if you need to stop and restart.
  6. When you’re done, click Stop.
  7. Use Movavi’s editing tools to edit your audio clip and then hit Export to choose your preferred file format and save or share your audio clip.

How can I record music on my computer for free?

Here’s our top-5 programs to record computer sound:

  • Movavi Screen Recorder – for recording computer and microphone audio, as well as gameplay and online presentations.
  • Audacity – for recording computer audio and mic.
  • Stereo Mix – for recording system or microphone audio to make online tutorials.
  • Voice Recorder for Windows 10 – for simple audio recordings.
  • Sound Recorder for Windows 11 – for recording and sharing quick audio clips.

Can work computers record audio?

Yes, if your work computer runs Windows 10 or 11, you should have a built-in audio recorder, and employers typically have the authority to record your system and mic audio.

Can I use Windows Media Player to record audio?

Yes, Windows Media Player has the capability to record from your microphone and other devices. With the correct settings, Windows Media Player can enable you to record system audio. If you’re having difficulty getting Windows Media Player to record your computer’s audio, check audio capture settings or try an app like Movavi Screen Recorder.

Have questions?
Have questions?
If you can’t find the answer to your question, please feel free to contact our Support Team.
Join us for discounts, editing tips, and content ideas

1.5M+ users already subscribed to our newsletter

By signing up, I agree to receive marketing emails from Movavi and agree to Movavi's Privacy Policy.