
How to Remove Watermark from Video: 6 Best Ways

Movavi Video Editor
  • Trim, cut, crop, and rotate videos
  • Add titles, stickers, and transitions
  • Apply visual effects

By clicking the download button, you're downloading a trial version of the program.*

Edited by
Ben Jacklin
4,010

Here is how to remove watermark from video you shot yourself: blur the mark, crop it out, cover it with your own logo, try an online editor, use an object-removal tool in a pro editor, or export again from the original project. Do it only with your own video or with the rights holder’s permission.

Check what kind of mark you have first. A static watermark stays in one place, like a corner logo or a channel nick. A moving (dynamic) watermark drifts across the frame. Text watermarks, such as a date or time stamp, sit on top of the picture, so the same logic applies when you want to remove timestamp from video or remove logo from video.

This guide fits creators who post lifestyle vlogs, unboxings, and travel videos, tech bloggers who cut game reviews and gaming videos, and anyone who makes brand clips for Instagram or Facebook. The quick answer: Movavi Video Editor handles a static or moving mark on the desktop, VEED suits a fast fix in the browser, and DaVinci Resolve suits people who already edit in Resolve.

The six ways at a glance

Way

Best for

Platforms

Starting price

Hiding a static or moving logo, nick, or timestamp on an unboxing or travel video

Windows, macOS

$19.95/month

Cutting a corner stamp out of game review footage

Windows, macOS

$19.95/month

Replacing an old logo on a brand clip for Instagram or Facebook

Windows, macOS

$19.95/month

A quick browser fix on a small brand clip

Browser, mobile app

$12/month

Removing an object from gameplay edited in Resolve

Windows, macOS, Linux

$295

Clearing Movavi’s own watermark from a travel video

Windows, macOS

$19.95/month

How we picked these ways

We chose them by four criteria: whether the method works on a static mark, a moving mark, or a timestamp; which platforms it runs on; what it costs to start; and how steep the learning curve is. Every way comes with a short step list and a note on who it suits.

6 ways to remove watermark from video

Way 1: Blur watermark in Movavi Video Editor
  • Best for

    a lifestyle creator who wants an old logo or channel nick hidden on an unboxing or travel video, even when the mark moves

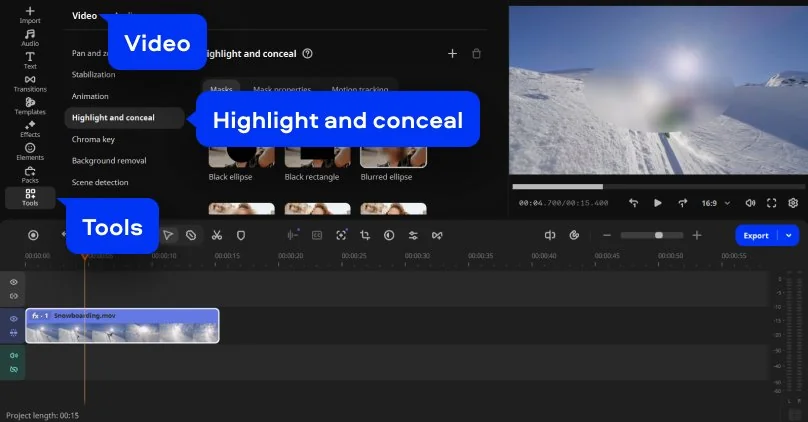
Why we picked it: Hiding an old logo or channel nick on an unboxing or travel video takes one tool here: Highlight and Conceal. You drag a Blur, Matte, or Pixels mask over the mark in the player and see how it looks before you export, so even your first pass comes out tidy.

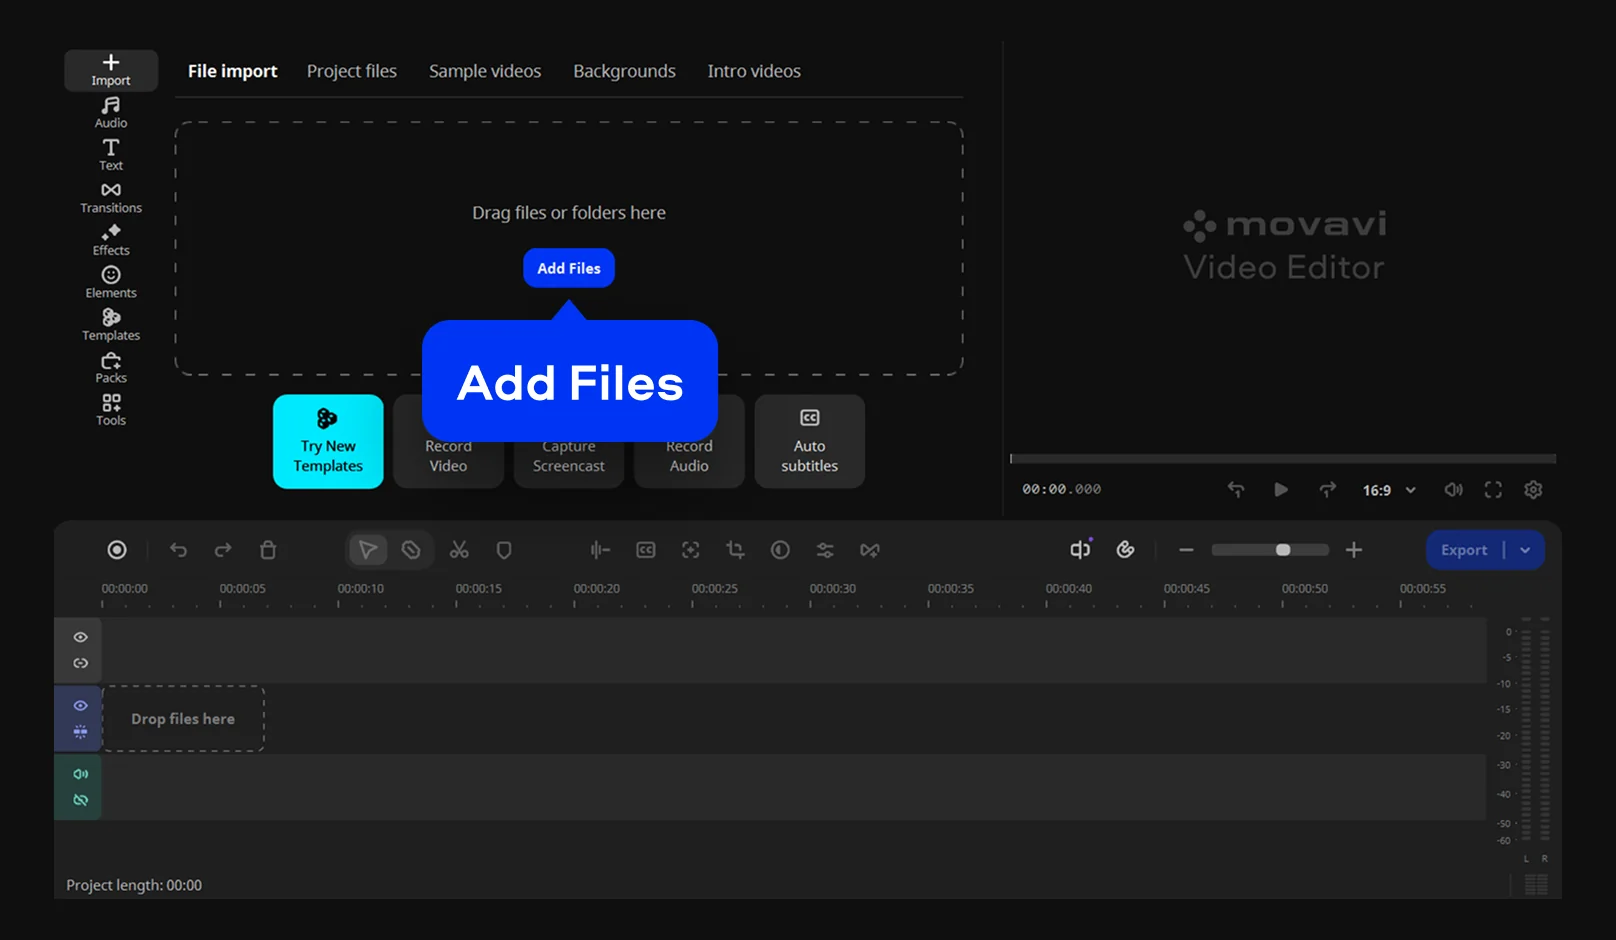
Movavi Video Editor is an intuitive video editor with customizable video templates, one-click AI tools, and hundreds of drag-and-drop effects. It is a desktop app for Windows and macOS, and the mask tool sits in the same timeline where you cut the rest of your vlog. You drag a blur frame over the mark and watch it in the player before you save. If the mark moves, motion tracking follows it, and AI picks the tracking settings, so you skip masking frame by frame. If you’re new to editing, Movavi Ideas is a free tutorial hub with step-by-step guides and new video editing ideas every week.

Movavi Video Editor has no AI watermark remover. Its tools hide the mark: a mask covers it, a crop cuts it out, or your own logo sits on top.

Key features:

  • Highlight and Conceal: masks include Blur, Matte, and Pixels, and Add mask covers a second mark.
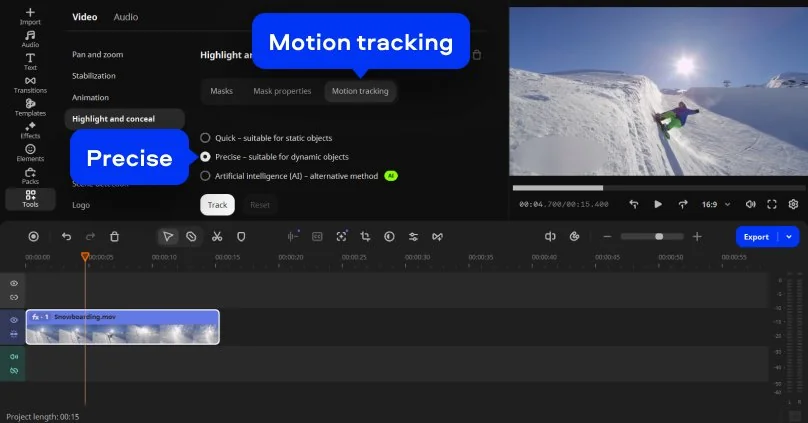
  • Motion tracking: Quick suits static objects, Precise suits moving ones.
  • Frame-accurate timeline scrubbing: step through the clip to check the mask holds in every shot.
  • Formats: MP4 and MOV are among the supported video formats.
Pros:
  • One mask tool hides a logo, a nick, or a timestamp.

  • Tracking follows a moving mark.

  • The file stays on your computer, with no upload to the cloud.

Cons:
  • Lacks advanced, detailed controls for a professional workflow.

  • No flexible UI customization.

Price and platforms: Windows and macOS. Free version. Starting price: $19.95/month.

Step 1. Add your video

Click Add Files. Select your video. Add the clip to the Timeline.

Step 2. Open the mask tool

Select the clip on the Timeline. Click the Tools icon on the left-hand sidebar. Select Highlight and conceal under Video. Choose the Blurred ellipse or Blurred rectangle mask from the list. In the player, move the frame over the watermark. Drag a corner of the frame to resize it.

Step 3. Follow a moving watermark (skip for static marks)

On the main track, separate the fragment with the watermark from the rest of the clip. Click the Clip properties button. Open the Motion tracking tab. Place the mask over the watermark and set the tracking area. Select Precise as the tracking method.

Step 4. Track and export

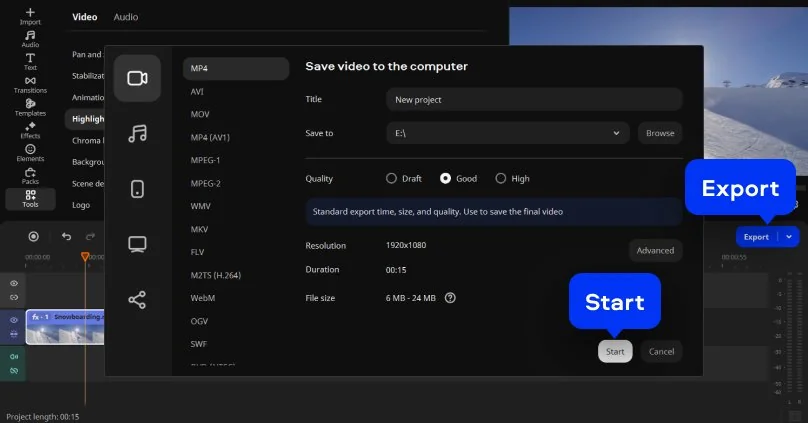
Click Track. Click Export. Choose the export format. Click Start.

Way 2: Crop watermark out of video in Movavi Video Editor

  • Best for

    a tech blogger with a stamp or logo in the corner of gameplay footage for a game review

Why we picked it: When a stamp hugs the corner of your gameplay footage, cropping is the shortest fix: the mark leaves the frame along with the edge it sits on. In Manual mode you drag the crop frame until the stamp falls outside it. Auto mode adds a second use, since AI keeps your main subject centered when you reframe a game review for Reels, YouTube Shorts, or TikTok.

Key features:

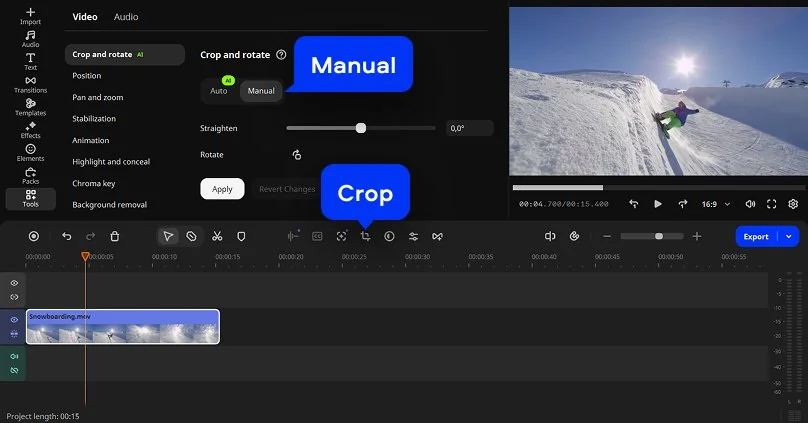
  • Manual mode: drag the crop frame to set the area you keep.
  • Auto mode: AI tracks the subject and crops around it.
  • Black bars: the same tool fixes black bars and mismatched aspect ratios.
Pros:
  • The mark leaves the frame entirely, with no blur patch.

  • Fits any static mark near the edge.

Cons:
  • No web version or cloud integration.

  • No flexible UI customization.

Price and platforms: Windows and macOS. Free version. Starting price: $19.95/month.

Step 1. Add your video

Click Add Files. Select your video. Add the clip to the Timeline.

Step 2. Crop the corner

Select the clip on the Timeline. Open the Crop tool. Choose Manual mode. Drag the crop frame so the watermark falls outside it. Confirm the crop.

Step 3. Export the video

Click Export. Choose the export format. Click Start.

Way 3: Remove logo from video by covering it with your own

  • Best for

    an entrepreneur refreshing a brand clip for Instagram or Facebook whose old logo sits in the picture

Why we picked it: If an outdated logo sits on a brand clip for Instagram or Facebook, a new logo or text label placed over it fixes the old mark and brands the clip in the same move. For a mark that moves, motion tracking lets the overlay follow it.

Key features:

  • Watermark/Logo tool: image or text with adjustable position, size, opacity, and duration.
  • Motion tracking: the logo can follow a moving object.
  • Image import: JPEG, PNG, BMP, and static GIF files work as logos.
  • Titles: text overlays with custom fonts, colors, outlines, and backgrounds.
Pros:
  • Your own logo doubles as the new branding.

  • Duration settings keep the overlay on screen only while the old mark shows.

Cons:
  • Lacks advanced, detailed controls for a professional workflow.

  • No web version or cloud integration.

Price and platforms: Windows and macOS. Free version. Starting price: $19.95/month.

Step 1. Add your files

Click Add Files. Select your video and your logo file. Add the clip to the Timeline.

Step 2. Place the logo

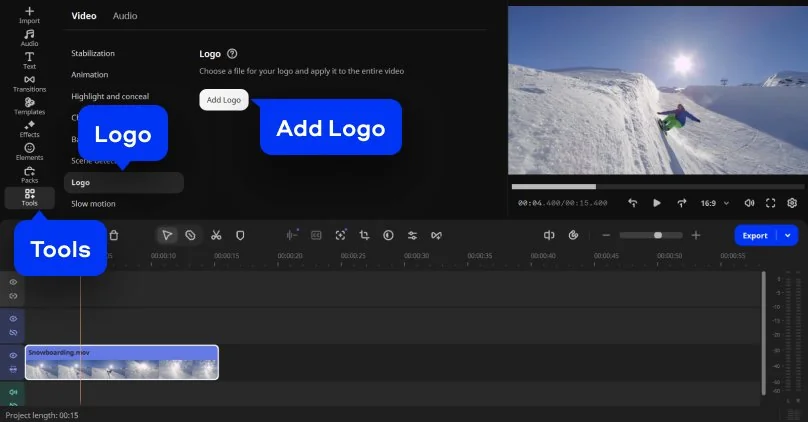
In the Tools menu, select Logo. Click Add Logo and import your image. Adjust the position and size so the logo covers the old mark. Adjust the opacity and duration. Turn on motion tracking for a moving mark.

Step 3. Export the video

Click Export. Choose the export format. Click Start.

Way 4: VEED

  • Best for

    an entrepreneur fixing a small brand clip for social media in the browser

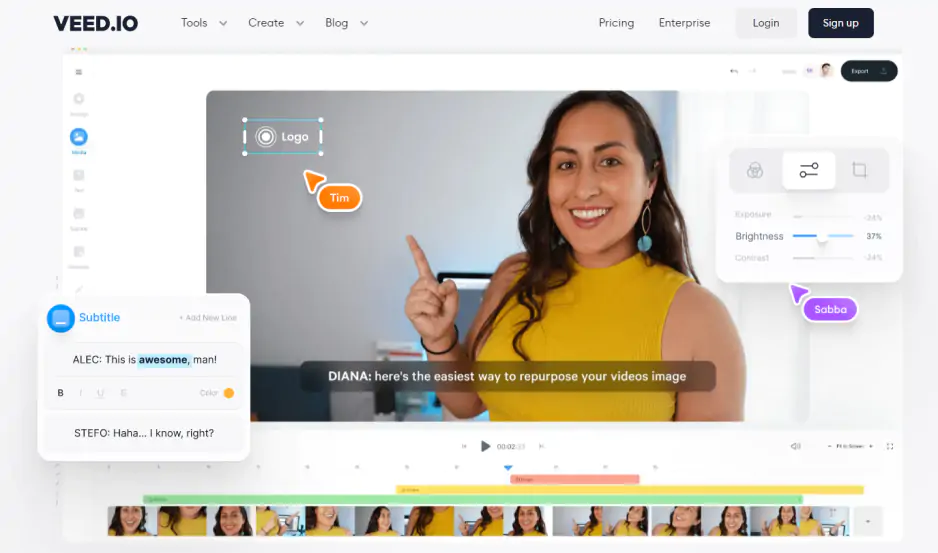
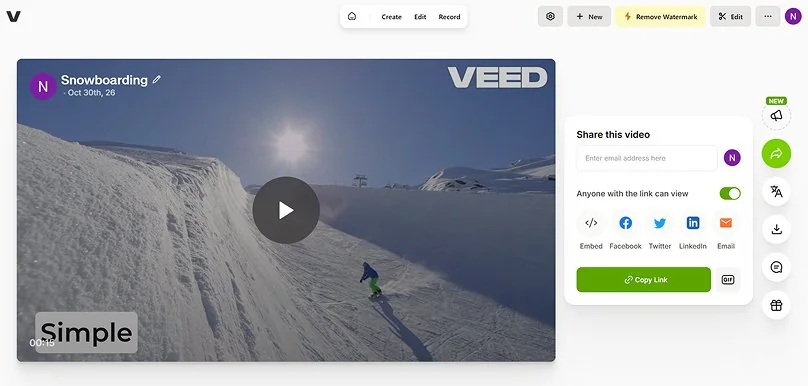
Why we picked it: VEED runs in the browser, with many AI tools in one menu. Its own guide covers watermarks with a crop tool and overlay elements: stickers, shapes, images, your own logo, or text with a background. Choose it when the clip is small and the browser is all you have.

Key features:

  • Browser editor: runs in the browser, with a mobile app, and needs an account and a stable internet connection.
  • AI credits: credits are spent on every action and can run out mid-project.
  • Free plan import limit: 1 GB per file.
  • Watermark removal: the crop tool drags a watermarked edge out of the frame, and overlay elements cover the mark. Elements include stickers, shapes, images, your own logo, or text with a background.
Pros:
  • Simple browser interface with nothing to install.

  • Accurate auto subtitles with styles and translation.

Cons:
  • Long, heavy projects can lag or fail to export.

  • The free plan exports with a watermark.

  • AI credits run out quickly.

Price and platforms: browser and mobile app. Free plan. Paid monthly or annual plans, billed per member: $12/month.

Step 1. Upload your video

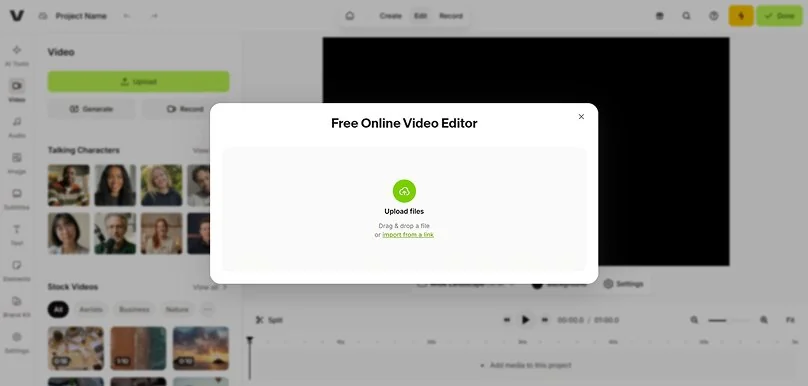
Open the VEED editor and upload your video file. Drag it onto the timeline or use the upload button.

Step 2. Crop or cover the watermark

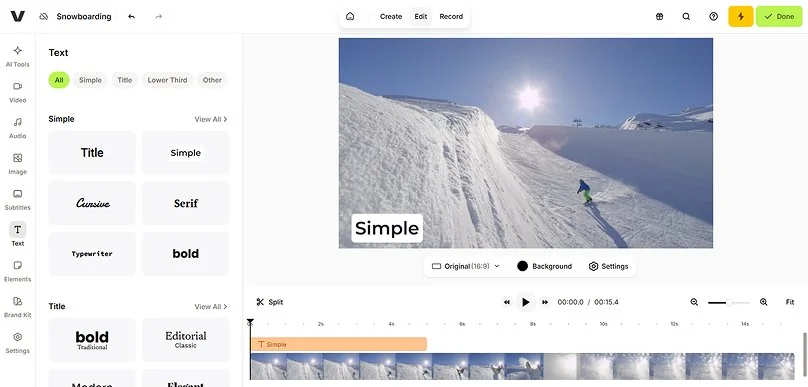
To cut the mark out, use the crop tool and drag the watermarked edge out of the frame. To cover it instead, place an element over the mark: a sticker, a shape, an image, or your own logo. For a text watermark, add text or subtitles in a style with a background. Resize and reposition the element until the watermark is fully hidden.

Step 3. Export your video

Export the video in the format you need, then download it.

  • Best for

    a tech blogger who edits gameplay in Resolve and needs one object gone

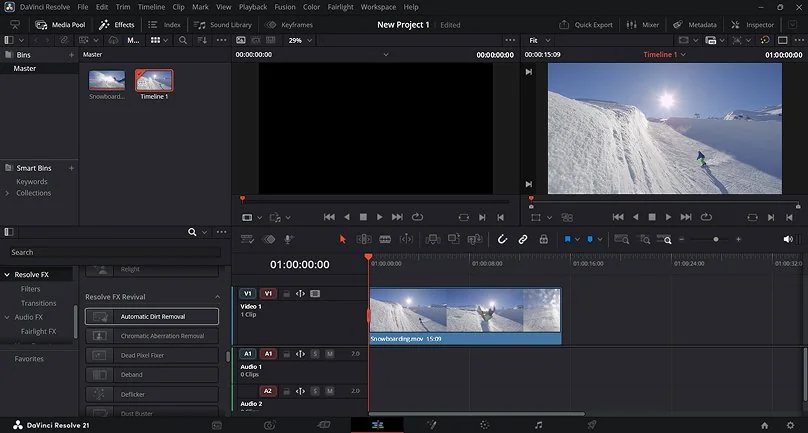
Why we picked it: Instead of covering a watermark, Object Removal tries to rebuild the area, which fills missing areas from the surrounding picture. Resolve borrows clean background from nearby frames. That makes it a fit for a gameplay clip where the area under the mark shows up clean elsewhere, and a poor fit for a static mark on a locked-off shot.

Key features:

  • Studio edition: a one-time purchase with no subscription.
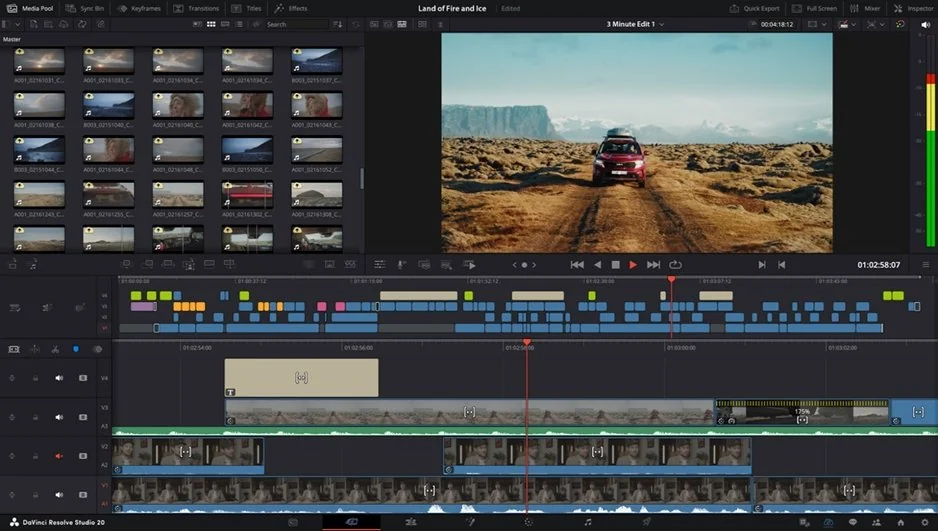
  • Separate modules: Edit, Color, Fairlight, and Fusion.
  • Magic Mask: automatic subject selection, Studio only.
  • Object Removal: a Studio-only effect that fills a tracked Power Window with background borrowed from other frames. It works best on small objects, and the hidden area has to show up clean somewhere else in the shot.
Pros:
  • The base version is free, with no watermark.

  • Frame-accurate editing for professional work.

Cons:
  • A complex, multi-part interface that takes time to learn.

  • Resource-intensive, with a strong computer recommended.

Price and platforms: Windows, macOS, and Linux. Base version free. Studio: $295.

Step 1. Prepare the shot

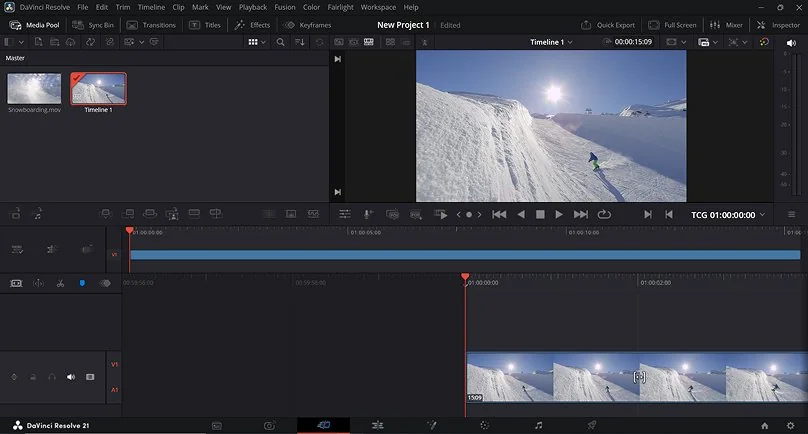
Duplicate the timeline or create a new grade version, so the original stays untouched. Scrub the whole shot from the first frame to the last and check that the area under the watermark looks clean in other frames. Add your clip to the timeline.

Step 2. Mask the watermark

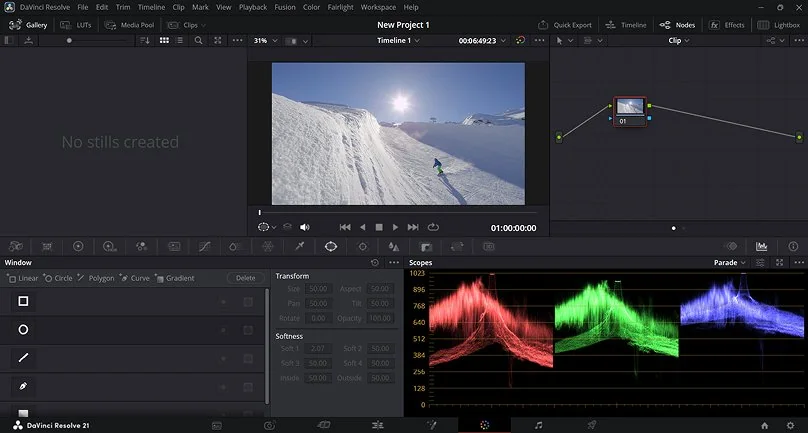
Open the Color page. Create or choose one Corrector node for the repair. Draw a Power Window that hugs the watermark, with just enough softness for its edge. Track or keyframe the Window through the whole shot, and fix any slips by hand.

Step 3. Add Object Removal

In the Effects Library, open Resolve FX Revival. Drag Object Removal onto the same Corrector node that holds the Window.

Step 4. Export the video

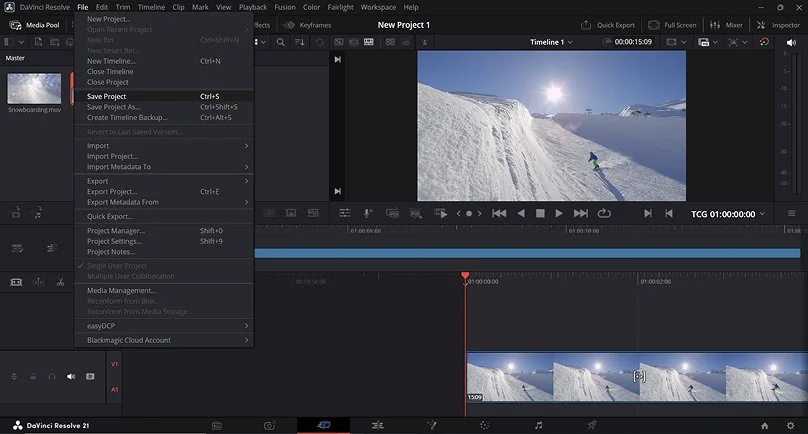
Save the result by going to File and clicking Save Project.

Way 6: Export again from the original project

  • Best for

    a lifestyle creator whose travel video left Movavi Video Editor Free or Lite with Movavi’s own watermark

Why we picked it: This way clears only Movavi’s own watermark from files made in Movavi software. Movavi Video Editor Free and Lite add a watermark on export, while the full version has no watermark or other export limits. Start free and upgrade when a project needs it. Buy the full version, activate it with the key from your purchase confirmation email, then export the project again.

Recordings made in the trial version of Movavi Screen Recorder keep their watermark. This way does not remove it.

Key features:

  • Full version: no watermark or other export limitations.
  • Project files: projects save as .mepj, so you export again without redoing the edit.
  • Activation key: arrives in your purchase confirmation email.
Pros:
  • Same edit, new export, with no masking.

  • Works on any media created in Movavi programs, except the Screen Recorder case above.

Cons:
  • Although hundreds of effects and several templates are available in the full version, additional sets require separate subscriptions.

  • No flexible UI customization.

Price and platforms: Windows and macOS. Full version price: $19.95/month.

Step 1. Reopen your project

Open your saved project by clicking Add Files.

Step 2. Export again

Click Export. Choose the export format. Click Start.

Which way works for which watermark

Way

What happens to the mark

Moving mark

Difficulty

Where the file goes

Hidden under a mask

Yes, with motion tracking

Beginner-friendly

Stays on your computer

Cut out of the frame

Only if it stays outside the crop frame

Beginner-friendly

Stays on your computer

Covered by your logo or text

Yes, with motion tracking

Beginner-friendly

Stays on your computer

Cropped out or covered by an element

Only while the mark stays under the element or outside the crop frame

Easy, with caveats

Browser, internet and account needed

Rebuilt from clean background in nearby frames

Yes, with a tracked Power Window, if the background shows clean in other frames

Hard

Stays on your computer

Absent from full-version exports

Not applicable

Beginner-friendly

Stays on your computer

How to choose a video watermark remover

Start with the mark. A logo mid-frame or one that moves points to Blur. A stamp hugging the edge of a game review points to Crop. An outdated logo on a brand clip points to Cover, and Movavi’s own watermark points to exporting with the full version of Movavi Video Editor.

Pick VEED if a browser is all you have, and DaVinci Resolve if you already own Resolve Studio. Blur, Crop, and Cover run in one desktop program, so you can blur one clip, crop another, and cover a third without uploading anything.

Movavi Video Editor
Create awesome videos easily

*The free version of Movavi Video Editor may have the following restrictions depending on the build: watermark on exported clips, 60-second video or 1/2 audio length limit, and/or some advanced features unavailable when exporting videos.

Frequently asked questions

Is it legal to remove a watermark from a video?

Only from your own video or with the rights holder’s permission. If the clip is not yours, ask the owner for a clean copy.

How do I remove a moving watermark?

Use motion tracking: set the tracking area, choose Precise, and click Track. If the track drifts, click Reset and set the tracking area again.

How can I remove a watermark from a video for free?

Movavi Video Editor Free lets you test the tools, but its exports carry Movavi’s own watermark. VEED’s free plan also exports with one, and DaVinci Resolve’s base version is free with no watermark and limited functionality.

How do I remove a timestamp from a video?

To remove text from video, such as a date stamp, blur it with a mask, crop it out if it sits at the edge, or cover it with a title that has a background.

Can I use a watermark remover online?

Browser editors like VEED need an account and an internet connection, so the file leaves your computer.

Have questions?
If you can’t find the answer to your question, please feel free to contact our Support Team.
Join us for discounts, editing tips, and content ideas

1.5M+ users already subscribed to our newsletter

By signing up, I agree to receive marketing emails from Movavi and agree to Movavi's Privacy Policy.